Showing posts with label HOW TO & DIY. Show all posts

The 3-Colour Rule Designers Use to Prevent Visual Chaos

If your room feels busy, mismatched, or slightly chaotic, the problem may not be your furniture. It may be your choice of colours. Learning how to decorate with only three colours can instantly create a cohesive, balanced space.


Too many colours can hurt the eyes; competing for attention, while too few can make the space feel flat and lifeless. But three colours, only? Yes, because three creates a perfect balance.

Have you ever been in a fix and had to search for:

How to choose a colour palette for a room.
How many colours should be in a room?
How to make my room decor look cohesive and balanced.
How to successfully decorate a room with just a few colours.

If you have, or have searched for similar home improvement queries, you are not alone. Many homeowners have also asked the same questions.

This guide will walk you through a simple colour palette that works in any room.


Why the 3-Colour Rule Works


Using only three colours helps your room feel organised and balanced. It also shows:

Clarity: The space feels clean and easy to understand. Your eye isn’t overwhelmed by too many competing tones.

Visual rhythm: When colours repeat in different areas, your eye moves smoothly around the room instead of jumping from one random colour to another.

Cohesion: Everything feels nicely connected with the furniture, decor, and textiles, and they all look like they belong together.

Intentional design: The room looks planned. Even simple spaces feel more polished when the colour palette is controlled.

With only three dominant colours, your room will not look like it’s randomly decorated. It will look and feel perfectly planned.

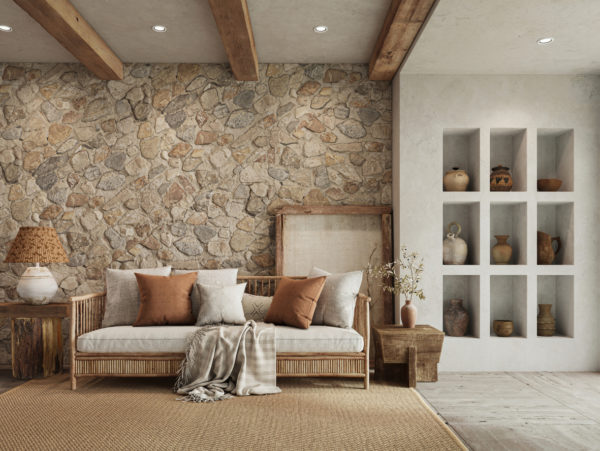
Step 1: Choose Your Base Colour (60%)

Your base colour is the foundation of your colour scheme and should cover roughly 60% of the room.

It usually appears in the following places:

Walls
Large furniture pieces
Area rugs
Floor finish

The popular choice for base colours includes:

Warm white
Soft beige
Light grey
Taupe
Soft greige (a combination of beige and grey)

The base colour sets the mood and should feel calm and neutral enough to support the other two colours. If your base colour is too bold, the room may feel overwhelming.

Step 2: Select Your Secondary Colour (30%)

Your secondary colour supports the base and adds personality. It usually appears in:

Upholstery
Curtains
Accent chairs
Larger decor pieces

For example, if your base is warm beige, your secondary might be:

Soft brown
Muted sage
Charcoal
Dusty blue

The colour should contrast slightly with your base, but not compete with it.

The base and secondary should feel like they belong in the same family (warm with warm, cool with cool).

Step 3: Add One Accent Colour (10%)

Your accent colour may be the smallest percentage, but it must have the biggest impact. The pieces best suited for accent colours are:

Cushions
Artwork
Vases
Lamps
Books
Small decor pieces

A real-life colour scheme example should be as follows:

Base: Warm white

Secondary: Soft brown

Accent: Muted blue

The key rule:

Repeat your accent colour at least three times in different parts of the room. Repetition makes it feel intentional, and not just random.


How Do You Know If Your Room Has Too Many Colours?


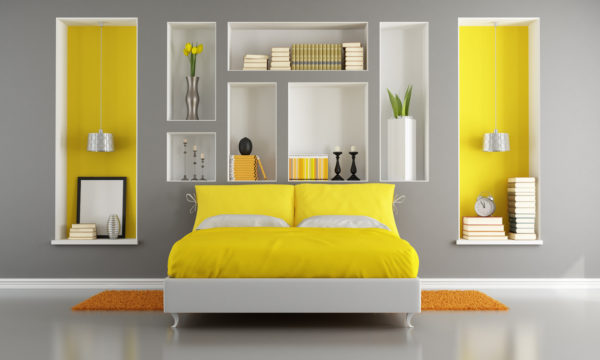
You definitely have a colour riot in your room if:

  • Every cushion is a different colour.
  • Art introduces new tones that don’t repeat.
  • Decor was bought individually, without a palette plan.
  • Your eyes don’t know where to rest.

A cohesive room allows your eyes to move smoothly around the room.


Real Example of a Living Room Reset Using Only 3 Colours


Imagine a small living room with:

A grey sofa
Mustard cushions
Blue throws
Green plant pots
Pink artwork
A brown coffee table
A beige area rug

Individually, they may be beautiful features, but together, they are competing with each other for attention. 

Now apply the 3-colour rule:

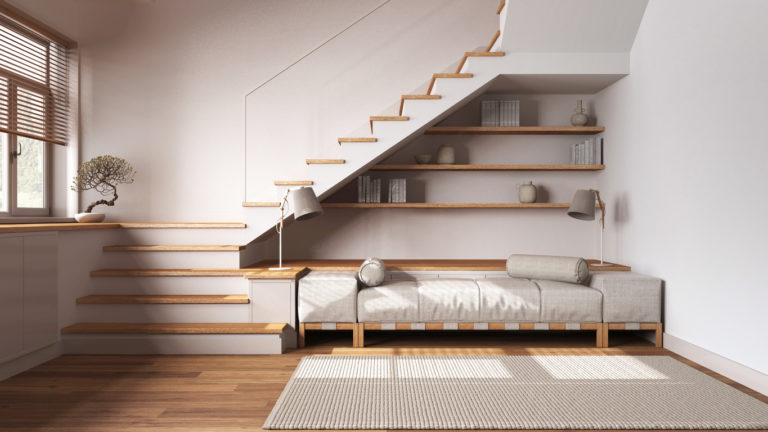
Base: Warm beige (walls and area rug).

Secondary: Soft brown (coffee table and chair).

Accent: Muted blue (cushions, artwork, and small decor items).


When you remove the mustard cushions and pink artwork:

The room will feel calmer.
The eye moves smoothly.
Everything connects together.

Note that, although nothing expensive was added or changed, the colour structure improved.


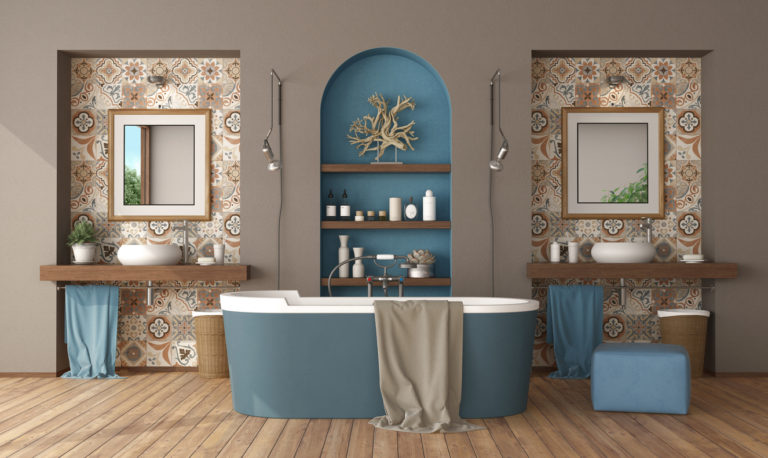
Warm vs Cool Hues: Why Undertones Matter


One common mistake among decorating homeowners is mixing warm and cool tones unintentionally.

Warm tones include:

Cream
Beige
Warm wood
Terracotta

Cool tones include:

Blue-grey
Crisp white
Charcoal
True grey

If your base is warm beige and your secondary is cool blue-grey, the room may feel slightly off. So, before choosing your three colours, first check the undertones. When there is consistency, then there is harmony.


What About Patterns?


You can absolutely use patterns as long as they include at least one of your three chosen colours. For example, a patterned cushion that contains beige, brown, and blue fits perfectly into the colour palette.

Patterns should reinforce your colour choices, not introduce new dominant tones.


Can You Use More Than Three Colours?


Yes, you can, but they must be carefully introduced. You can include:

  • Wood tones
  • Greenery
  • Metallics
These colours often act as neutrals, but if bold colours start exceeding three dominant hues, the room may lose clarity. When in doubt, reduce first and add later.


A Quick 5-Minute Colour Audit


Stand in your room and list the visible dominant colours. Ask yourself if:

  • You see more than three strong tones.
  • One colour dominates too much.
  • The accent colour is repeated at least three times.
  • Your chosen colours share similar undertones.
If the answer feels unclear, then your palette likely needs simplifying.


Why This Method Works in Small Spaces


Small rooms (especially) benefit from limited colour palettes. Too many colours, small spaces will feel cluttered, but with three, and in the right ratio, you will achieve visual continuity, beautiful calmness, and a more spacious look.

So, if you find that your small living room looks/feels busy, simplify your palette to instantly improve it.


Would You Like Some Help Choosing Your 3-Colour Palette?


If you would like a structured worksheet that will help you:

  • Identify a base colour
  • Select a balanced secondary colour
  • Choose and repeat your accent colour with intention

Or maybe audit your existing decor, download the Room Clarity Blueprint. It will walk you through diagnosing anchors, scale, layering, and colour, step by step.

Download the Room Clarity Blueprint here.


Final Thoughts


Decorating with three colours is not restrictive, but it’s more stylish and visually freeing. When your palette is clear and chosen with intent, then shopping for furnishings becomes easier, styling becomes simpler, and the rooms feel more finished, faster.

Structure creates calm, and calm is what you need to make your home feel comforting and aesthetically appealing.


Related Posts:

How to Fix a Room That Feels Messy, Disorganised, and Mismatched

Why does your room feel messy or unfinished? Learn 5 simple interior design fixes to create a cohesive, balanced, and intentional space.

Let's say you bought the sofa, added attractive cushions, and hung art. And yet, something feels off. Or your room looks fine, but it appears unfinished. It feels mismatched, slightly chaotic, or visually confusing.


If you’ve ever searched:

  • Why does my room feel unfinished?
  • How to make a room look cohesive.
  • How to fix mismatched decor.

You’re not alone. The good news? The problem is rarely your taste or your style.

In this guide, I will walk you through five clear steps to find out exactly why your room feels off, and how to fix it without starting over or overspending.

Step 1: Identify the Missing Anchor


Every well-designed room has a visual anchor. But first, what is an anchor? It is the element that:

  • Make the space well-grounded.
  • Draws the eye first.
  • Organises everything else around it.

Common anchors include:

  • A properly-sized patterned area rug.
  • A statement wall-hung metal artwork.
  • A fireplace with a classic look mantle.
  • A headboard with built-in reading lights.
  • A bold statue on a tall, clear Perspex display stand.

When a room lacks an anchor, everything is just… ‘blah’. Features and elements begin to float. And nothing feels intentionally set up.

Anchor Tests You Can Apply


Stand at your room’s doorway and ask yourself these three questions:

  • What draws my eye immediately?
  • Is there one clear focal point?
  • Does my eye bounce around the room?

If you find that your eye keeps moving without settling on a focal point, it means that your space lacks a strong anchor.

How Do You Fix This?


Choose a dominant feature, and build around it. For instance, if it’s an area rug, ensure it is large enough to draw attention. If it is wall art, centre it properly. Scale it appropriately to the wall at the right height for optimal visibility. When your space's anchor is clear and outstanding, the interior cohesion improves instantly.

Step 2: Improve the Scale and Proportion


One of the most common reasons a room looks uninteresting and feels wrong is the incorrect scale and proportion of features and other interior elements.

Typical issues are, for example, when rugs are too small, art is hung too high (or low), a coffee table is too tiny, or the sectional is massive for a compact space. Another reason is having microscopic light fixtures in large, spacious rooms.

Scale is not about how much a piece costs. It’s about scale and proportion.

The Rug Rule

A living room rug should:
  • Sit under at least the front legs of your seating.
  • Ideally, extend beyond both sides of your sofa.
With a small rug, you are shrinking the entire room visually and making the furniture look (sort of) disconnected.

The Artwork Rule
  • Artwork should generally be:
  • Hung at eye level (roughly around 145–150 cm from the floor).
  • Scaled to about 75% of the furniture width below it.
A tiny wall-hung art placed above a large sofa creates an imbalance.

The Coffee Table Rule

Your coffee table should be about two-thirds the length of your sectional or sofa and roughly the same height as the sofa seat.

Correcting the scale alone can transform a space without buying new furniture. Sometimes, all you need is repositioning.

Step 3: Simplify Your Colour Scheme


Many mismatched rooms suffer from colour overload. Imagine this scenario: You have blue cushions, jade green throws, gold-plated lamp stands, pink walls, and a Grey sofa!

Individually, each item may be beautiful or even pricey, but together, the look is a disaster. They all compete for attention.

Use the 60–30–10 Method

Here is a simple formula you can use. Professionals in the interior design industry use this principle as well. For the best working colour scheme, use:

60% dominant base colour.
30% secondary colour.
10% accent colour.

For example, choose colours as such:

60% warm neutrals.
30% soft browns.
10% muted blues.

Use your accent colour in at least three different places in the room. Like blue cushions on the sofa, some blue detail in the wall art, and a blue vase on a side table.

When a colour appears more than once, it starts to feel intentional instead of random. The repetition helps make the space appear connected and balanced.

If your room feels chaotic, limit your palette and repeat deliberately.

Step 4: Add Visual Layers


A room feels unfinished and messy when it lacks depth. If your interior space looks flat, it probably has:

  • Just one overhead light.
  • Minimal textiles and textures.
  • Bare walls.
  • Few height variations.

A finished room must feel layered. Layering includes utilising lighting, textiles, height variations, and natural elements.

Lighting:
Overhead
Table lamps
Floor lamps
Accent lighting

Textiles and textures:
Rugs
Curtains
Cushions
Throws

Height variation:
Tall plants
Low coffee tables
Medium-height side tables

Natural elements:
Wood
Woven textures (rattan, etc.)
Greenery

Layering makes a room feel intentional and lived-in and not staged or sparse. So if your space feels flat, you don’t need more furniture. You need layered detail.

Step 5: Remove What Doesn’t Add Value


Clutter makes a nonsense of an interior. When too many items compete for attention, even a well-designed room feels messy. To remove what adds no value to your space, try this 30% edit challenge:

Remove 30% of your decor.
Step away for a few hours.
Return and reintroduce only what truly adds balance to the room.

Often, you will find that the room instantly feels calmer, airier, and more stylish. Simplifying the space is not about minimalism but about clarity.

A Real-Life Example of a Small Living Room Reset


Imagine a typical suburban living room, with:

  • A big beige sofa.
  • Small patterned rug.
  • Random blue and mustard cushions.
  • Tiny artwork.
  • A single ceiling light.
  • A small coffee table.

This mix is very mismatched. It feels like a decorating mess, as well.

Now, to fix this mismatch, apply the five steps:

  1. Replace the rug with a larger neutral rug that fits under the seating and extends from the sides of the sofa.
  2. Swap tiny artwork for one large statement piece that visibly stands out over the sofa.
  3. Reduce accent colours to one (eg, muted blue repeated in cushions and art).
  4. Add a floor lamp and a textured throw.
  5. Remove the excess small decor.

The Result

The room has not changed in cost, but it now feels cohesive, calm, intentional, and aesthetically appealing.

Summary: Why Rooms Feel Off


If your room feels cluttered, unfinished, or decoratively messy, it’s usually one of these:
  • There is no clear focal point (anchor).
  • Using an incorrect scale.
  • There are too many competing colours.
  • Lack of visual layering.
  • There is too much visual noise.

Before going out to shop, notice what is missing first, then fix it.

Will You Like a Free Printable Step-by-Step Room Diagnosis?


If you’d like to walk through this process with a clear worksheet, I created something for you. And it’s free. The Room Clarity Blueprint is a 7-page printable guide that helps you:

  1. Identify your room’s anchor.
  2. Test scale and proportion.
  3. Refine your colour scheme.
  4. Assess layering.
  5. Create a focused action plan.

It helps to turn this article into a practical working session.

Download the Room Clarity Blueprint here.

When Your Space Begins to Look and Feel Finished.


A room rarely feels wrong because you lack style. It only does because it lacks structure. Once you understand anchors, proportion, colour rhythm, layering, and editing, you will stop decorating randomly and start designing intentionally.

And that’s when your space begins to look and feel finished.


Related Posts:
How to Develop an Interior Design Concept – 5 Basic Principles to Follow
How to Create Different Zones Within a Room

How to Clean Bamboo Wood Floors the Right Way (Without Ruining Them)

Bamboo floors look sleek, warm, and are beautifully natural materials, but the dilemma many homeowners face is how to keep them looking bright and clean at all times.

Bamboo wood flooring (strand woven).

When it comes to cleaning and maintaining bamboo, many manufacturers recommend treating it as you would other hardwood materials. It only requires light cleaning often, but not heavy moisture. Never wet bamboo floors.

This is a simple and realistic guide to keeping your bamboo flooring in top shape without using fancy products or complicated routines.
 

What to Do


Wipe spills quickly (and buff dry).
Use a slightly damp cloth to lift spills, then dry-buff right away. The goal is to avoid pushing moisture into the grain, which will leave visible marks over time.

Remove scuffs with a soft cloth.
Light scuff marks usually lift when you rub them gently with a dry cloth. For stubborn marks, use a cleaner made specifically for bamboo or hardwood flooring and buff the area dry.

Vacuum often. Daily, if the space is busy.
Fine grit is the silent enemy of bamboo floors. Regular vacuuming helps prevent tiny particles from scratching the surface, especially in high-traffic rooms.

Use ONLY bamboo-safe or hardwood-safe cleaning products.
If you need deeper cleaning, choose a non-alkaline, non-abrasive product designed for bamboo or hardwood. Check the label to make sure it is wax-free.

Sweep with soft bristles often.
If vacuuming isn’t your thing, choose a broom with soft, fine bristles to avoid surface scratches.

For rubber scuffs, use a small amount of wood floor cleaner.
Apply the cleaner to a cloth. Do not apply directly on the floor. Rub the scuff gently until it disappears.

What Not to Do


Avoid using cleaners that leave residue.
Anything that creates a film can interfere with future refinishing. It can also dull the natural look of your floor.

Never use a wet mop or soaking-wet sponge.
Even though bamboo handles moisture better than some woods, standing water or drenching can still cause damage.

Follow the manufacturer's dilution instructions.
If your wood floor cleaner requires mixing with water, stick to the recommended ratio.

Don’t let dust and debris build up.
Daily foot traffic brings in particles that scratch the floor surface over time. Keeping the floor swept and cleaning it lightly (occasionally) helps preserve its finish.

Avoid using dust-mops with stiff bristles.
Coarse brushes can leave micro-scratches.

Do not use steam cleaners.
Steam can penetrate and damage bamboo flooring, and many flooring manufacturers warn against it because the effects can be permanent.

Make Cleaning Your Bamboo Floor Consistent


Taking care of bamboo wood floors isn’t complicated; it just comes down to consistency and gentle habits. A quick daily sweep, fast spill clean-ups, and using the right products go a long way in keeping the surface smooth and beautifully natural. With these simple routines, your flooring stays protected, looks fresh for years, and continues giving your interior that warm, modern glow without any high-maintenance drama.


Related articles:


How to Decorate Small Spaces Like Niches, Alcoves, and Recessed Walls

Decorating small spaces in a room can become a delightful venture and one of the easiest ways to introduce a pleasant and functional interior design feature into an otherwise neglected space. Wall recesses, blind corners, nooks, under staircases, dead ends, and niches are examples of dead space that can become a designer’s delight. Many homes have these pockets of space. While some are pre-determined interior design features, others came about because of construction flaws.

There are so many possibilities and design ideas for decorating small spaces. With creative flair, an eye for detail, and a sense of proportion, you can develop something simple or grand from small spaces.


Decorating cubby-holes with beautiful ceramic pottery.

Alcoves


An alcove or nook is a partially enclosed section of an interior space. It is cave-like in appearance and is separated from the room space by walls or arches, like a cut-in space without a door.

Alcoves were known features in period homes formed from chimney breasts that protruded in the centre of a room, forming double recesses on both sides of the fireplace. They served as built-in shelving for books, décor items, and other display items in the living room. And in the bedrooms, they served as wardrobe space. Today, alcove designs have anything from small tucked-away kitchenettes to art galleries, built-in bathroom stash cabinets, and stand-alone display units. 


Alcoves on both sides of the projected central fireplace area.


And alcoves formed under the staircase, in lofts, dead corners, and similar odd spaces can serve functional purposes like storage solutions, work-at-home stations, private seating areas, built-in closets, personal reading/library, or craft-making areas.

Niches


A niche is like cubby holes, but their sizes and shapes can vary from very small to large sizes with regular or irregular shapes. They are great ways to create more space for décor display objects like sculptures, figurines, vases, and collectables or serve as spaces to stash anything from napkin holders and spices to books, tableware, or odds-and-ends.

Wall niches can be created easily by building recesses into an existing wall or as ready-made wooden boxes installed in holes punched into dry walls. They are wall enhancements and may appear like a gallery of symmetrical or asymmetrical cubby holes.

Decorating small spaces like niches demands creativity and careful planning, whether you intend to carve them out during renovations or embark on new constructions. They are in modern high-end homes as pre-fashioned insets with an arch or straight top ends. Many come styled after the Greco-Roman design with classical sculpting on the sides.


Niches in a modern bedroom, with a yellow and grey color scheme


Wall Recesses and Awkward Corners


There are always several tight corners, wall recesses, dead ends, and other general spaces around the home, which designers call wasted space. Decorating these small spaces can be overlooked at times. Why? Because many household occupants hardly ever notice them.

Don’t let any extra space like this go to waste. Maximise every square foot (or metre). These spaces can serve as functional features around the home. For instance, narrow floor-to-ceiling wall shelves will fit into any little corner and are an excellent way to store bathroom essentials. And in the bedroom, you can make a dead-end space functional by installing hanging hooks.

So, whether you live in a studio apartment or a three-bedroom home, creative interior design and decorating ideas will help you make the best use of every small space, corner, or dead-end in your home.


16 Small Space Decorating Tips


Positions and sizes of what requires decorating will differ from home to home. But whatever the form or configuration may be, decorating these empty/dead-end/cubby-hole/wasted spaces should add function and aesthetics to the room.

To spark your creative juices, open your imagination, and inspire you, below are a few guiding tips to make you do something about that unused space in your home.


Beautiful bathroom setting with two sinks and a bathtub on a hardwood floor. Note the two alcoves and arched wall niche.

  1. Install a custom-built unit for added storage space in nooks.
  2. Add a stool (or nesting stools), flowers (fresh or faux) in a vase, and woven baskets (fill with whatever you wish and place strategically).
  3. Hang a round or oval-shaped vintage mirror on a dead-end wall. Add dried plants in large urns (vases) to soften the space.
  4. Transform the end of a windowed corridor by introducing a custom-built window seat (or bench) with vibrant colored cushions. Ideal for dead ends.
  5. Think vertically. Exploit the often unused space between the top of furniture and the ceiling. Use hanging or high-mounted elements.
  6. Create a gallery wall with plaques or framed pictures of varying sizes and shapes. Both symmetrical and asymmetrical arrangements work well. Extend the gallery wall into a corner to help the lines of your space disappear.
  7. Add a floating desk to free floor space. Additional shelves above the desk will be display surfaces for books or ornaments.
  8. Hanging plants take the eyes up. Add corner shelves for potted plants display, like cacti or other tiny colourful plants.
  9. Add groups of varying heights of vases or urns, and if it is a small space, add a tall urn and hang a framed painting above it. Place them on a small round rug.
  10. Depending on the floor space available, put a chair in the corner and place a floor lamp next to it. Make it a reading corner.
  11. If it is in the hallway, you can install hooks to hang a bicycle on the wall.
  12. Tiled mirrors do wonders in tricking the eye to see a seemingly enlarged space, so utilise mirrors if you can. Use bronze or antiqued mirrors for a dramatic look.
  13. Create a floor-to-ceiling library of books. Use floating shelves for a lighter feel.
  14. Install a couple of floating shelves to hold bowls of potpourri, a tabletop waterfall feature, or bowls with scented candles floating on water.
  15. Turn the under-staircase alcove into a work-from-home office.
  16. Make it simple by placing a round table in a corner with an eclectic table lamp and decor objects set on it.


If you have a feel for design, you will agree that decorating small spaces should not be a challenge. The great thing is that decorating unused spaces in the home can be done by most homemakers with an eye for the good stuff. There will be no need to request the services of expensive professionals.


(Article originally published by the author at hubpages.com on 09/01/10)
Images used under license from: https://www.istockphoto.com


Related
How to Develop an Interior Design Concept – 5 Basic Principles to Follow
4 Bedroom Design Ideas with Exotic Ethnic Flair
How to Create a Work-from-Home Office Workspace
Interior Design: Frequently Asked Questions (FAQ)

4 Bedroom Design Ideas with Exotic Ethnic Flair

An ethnic bedroom design offers several style potentials that are not restricted to concepts related to African, North American, and Australian natives. Contrary to the general belief that ethnic designs are tribal, the concept of the style can often be associated with the exotic. The bedroom is one of the interior spaces that can translate the style in a striking manner.

From subtle earth tones and rough textures to vivacious colours and elaborate patterns, fashioning your bedroom in an ethnic style means that it is infused with both traditional and art-inspired features and elements typical of the style’s theme.

Creating a bedroom design depicting an ethnic theme is easy to achieve and fun to put together, and in a contemporary bedroom set-up, the trick is to ensure you complement your modern furniture with different local art, furnishings, and finishes.

A modern bedroom with an ethnic touch. Notice the wall art, headboard, and bedspread - all ethnic elements, set in a modern bedroom with clean hard floor, modern wall sconce, and Venetian blinds.
A modern bedroom with an ethnic touch. Notice the wall art, headboard, and bedspread - all ethnic elements, set in a modern bedroom with a clean tiled floor, a modern wall sconce, and Venetian blinds.


How to Create an Ethnic Theme Bedroom


If you wish to create an ethnic theme, though some may disagree, it is best to keep within a particular theme rather than create a mishmash of ethnic elements. For instance, if you wish to create a Mexican ethnic theme, mixing Mexican elements with traditional native American themes may end up giving the bedroom an undefined look.

Using the word 'ethnic or tribal' may sound objectionable to people who don’t appreciate the artistic interest this holds for some designers, decorators, and homeowners, but being ethnically inclined means having an interest in the arts and crafts of ancient times that can be incorporated with modern features.

Examples of ethnic bedroom interior design are:

African theme

With a sleek modern bed, nightstand, and dresser introduce elements like:
  • An African tribal mask mounted on the wall (or wall-hung talking drums).
  • A heavily patterned handwoven rug on a stone floor finish.
  • A couple of large floor pillows covered in rustic textiles or African prints.
  • Collection of décor objects like artefacts,
  • Stone or hardwood floor finish.
  • Faux animal skin.
  • Woven baskets and wood carvings.
  • Brass or copper sculptures.
  • Pendant lights and table lamps with textured fabric, feathers or shades.

The bedroom design may contain all or a minimum of four of the listed elements to create an ethnic look.

Japanese ethnic theme 

For an oriental inclined ethnic bedroom décor, use a low bed with side cabinets and a chest and introduce furnishings like:
  • Umbrella-art inspired ornaments
  • Oriental hanging lanterns or table lamps
  • A two-panel folding screen.
  • Traditional Japanese plants, like bonsai and bamboo.
  • Tabletop water feature. Elements of water are important in Japanese homes.
  • Bamboo wood flooring or stone tile floor finish.
  • Simple bamboo window shades, or sheer, gauzy fabrics for curtain panels.

Japanese style revolves around a clean, orderly, and uncluttered look, with all elements set together in a balanced order.

Mediterranean ethnic theme

The Mediterranean style is primarily a fusion of several different sub-styles influenced by the colourful and classic Spanish influences, the Greek style with hues of blue, turquoise and plenty of white, and the old-world charm of the Italian style. There is also the bold influence of the Moroccan style that can take a bedroom in an entirely different direction. Bedroom furnishings you’ll require to create an ethnic style include:
  • A white backdrop of walls and natural, but vibrant, earth hues.
  • One textured wall.
  • Wrought iron light fixtures.
  • Moroccan rug.
  • Wrought iron chandelier.
  • Wall art with images of Mediterranean scenery.

The Indian touch

The two main elements of Indian design are their rich colours and exotic textures, and adding Indian features to your ethnic bedroom design gives an intriguing effect. From furniture to décor items, the unique traditional pieces typical of the region include:
  • Handwoven Ikats textiles and upholstery.
  • Indian embroidered cushion covers
  • Wood floor lamp.
  • Ottomans
  • Colourful lanterns.
  • Ethnic solid wood bedside tables
  • Copper vases.
  • Silk cushions
  • Indian ethnic cotton bedcovers.
  • Traditional India carpet.
  • Glasswork and ceramic vase.
  • Brocade upholstery.
  • Kashmiri rug.

A Mix of Different Styles


This can be dicey unless you want an eclectic theme. If you have to, don’t for instance, mix a Moroccan theme with other styles like Asian or Hispanic. Moroccan is an African theme so it's best to keep it African. A good mix will be a Moroccan theme with a dash of Safari East Africa.

Blending elements of the American prairie bedroom design with some Latin American basics will give a surprisingly stylish look. Also, you can combine Native American with Prairie furniture décor and a couple of understated tropical themes.
Luxurious bedroom setting in predominantly ethnic style.

Blending the Modern with Ethnic Design


If you're not one for the total ethnic look, you can mix ethnic furnishings with modern bedroom furniture. Alternatively, you can have ethnic furniture enhanced with modern finishes and decor. But how can you create this effect?

It's not that hard, considering there is no hard and fast rule on how to achieve a successful mix. But there must be a balance.

  • Use beds, headboards, and/or chests with clean classic lines and then incorporate ethnic furnishings, like an accent chair or two, with a carved stool or chest and a modern reading lamp.
  • Spread a plain white modern duvet on the bed and arrange some African print throw pillows at the head of the bed. A faux animal print rug like zebra, leopard, or tiger prints at the foot of a modern sleek bed set.
  • Hang metal artwork on the focal wall of the room which is usually at the bedhead. Add Moroccan pendants or fretwork lamps to illuminate the room by casting out patterns on the walls. Let everything else in the bedroom consist of modern furniture.
  • Set an ethnic fretwork divider against the wall to serve as a headboard or use it as a screen to hide away an open wardrobe or clothes rail.
  • Add ethnic texture to a modern bedroom setting through fabrics, window coverings, duvet covers, upholstery, wall art, or lampshades.

Use decorations to replicate the modern or ethnic look. These decorations include vases, candle holders, tabletop ornaments, stone or wood carvings, aromatherapy oil burners, etc... Little details like these will create a theme that works well together.

Ethnic oriental bedroom design with a blend of a modern style.
Ethnic oriental bedroom design with a blend of modern style.


Some other ethnic-style furnishings you can add to your bedroom design include:
  • All kinds of pottery
  • Animal-inspired ornaments
  • Umbrella art, painted wall fans, and classic paper lamps
  • Traditional incense holders
  • Hammered metal sconces
  • Beaded box containers
  • Chests
  • Handwoven rattan tables

A modern minimalist bedroom layout with a rustic floor finish, modern chair, and contemporary table/reading lamps. The setting is typical of an ethnic theme.
A modern minimalist bedroom layout with a rustic floor finish, a modern chair, and contemporary table/reading lamps. The setting is typical of an ethnic theme.

Ethnic decor colours you can blend with a modern bedroom interior design include white, off-white, earth colours like ochre, burnt orange, bright red, deep shades of blue, all shades of brown, terracotta, and sand. All these warm hues will add a comforting cosiness to any bedroom fashioned after the ethnic style.

(Article originally published at hubpages.com on 01/07/13)

Articles of interest: 
Design Interior Spaces
Eclectic Style Mistakes to Avoid

How to Install Floating Hardwood Floors By DIY

A DIY installation of floating hardwood floors is not that difficult or challenging, as long as you read and stick to the flooring manufacturer's manuals and instructions.


The first thing to note is that different types of wooden floors require different systems of installation, and these explicit details can be found in the mentioned manuals.

In any D.I.Y. project, it is imperative that the step-by-step instructions be read and assimilated carefully so as to ensure a well-laid and beautiful floating hardwood floor finish.

Preparation of the subfloor that will receive the hardwood floor strips is crucial and can make the whole DIY task successful or turn out a failure.

As the wood strips are not being attached to the subfloor, floating hardwood floors can be installed over almost any kind of floor base.

Preparations


To prepare for the installation of floating hardwood floors, the following must be done:
  • The subfloor must be very clean and dust-free.
  • The floor must be very even, without any humps, bumps, or crevices.
  • Deciding on the direction in which to lay the floating hardwood floor.
  • Make sure that the space between the finished hardwood floor and the subfloor is no more than three-quarters of an inch (18mm).
  • Gathering the tools required to complete the D.I.Y. flooring job.

Tools Required to Install Hardwood Floors


To install floating hardwood floors, the general tools required are:
  • Woodworkers glue
  • Spacers
  • A hand saw, or a jigsaw
  • A ruler
  • Straps
  • A hammer
  • Chalk
  • A tapping block
  • Pull tool

Installers will need to check the manufacturer's detailed instructions to know if any additional tools are required. All these tools can be bought at any home improvement, D.I.Y. stores or online at eBay.

Installation Process


First, test the floor to see if it’s even and level. This can be done by laying a plank of wood at the edge of the floor.

If there is any space between the wood and the sub-floor that's more than 3/4 of an inch (18mm), spread some self-levelling joint compound on the floor.

When the compound dries, your sub-floor should be adequately level, and you are ready to proceed.

The most important rows while installing floating hardwood floor planks are the first 3 or 4 rows. If these rows are not straight from the start, you may as well know that as you proceed along, the lines become less and less straight, and the installed planks will start to open up as you tap the next planks into position.

The planks should be straight, and all the joints should fit snugly, using clamps and straps to keep all the connections tight.

Now, start to attach the floating flooring planks by using an adhesive between the joints of the wood planks. To apply the glue, run a bead of glue along the joint of the wood, and then snap that piece into the first piece you've already set down.

The glue dries in roughly ten minutes, so you want to be clear on the placement of the wood before applying glue along the joints. Be careful, and do not use excessive glue.

During the installation of floating hardwood floors, it is a great idea to measure at least 2 times, so you don’t end up with too many off-cuts or pieces that will become useless scraps of hardwood.

While inserting each plank, fit the pieces together using a hammer, and tap them gently with a tapping block. Knock very gently to close the gaps. It's better to knock often, but softly, than it is to knock a few times with force. There shouldn't be any gaps between planks while installing floating hardwood floors.

Always drive in the joint directions that you are trying to close because once the pieces are set and dry, it will be virtually impossible to adjust the joints.

Effects of Weather on Floating Floors


As you lay them along, you must leave a bit of space around the perimeter of the room to allow for contraction and expansion that occurs occasionally during weather changes, because wood changes with time and temperature.

Towards the end of your floating hardwood floor installation task, the space left will need you to pull the iron and the hammer to draw the planks together. For larger areas, it is suggested to allow as much expansion area as possible.

After completing the installation of floating hardwood floors, you must fit in your base mouldings or skirting, transitions and trims to cover the spaces left at the edges for expansion. Then leave the floor to set as advised in the manufacturer’s instructions.

(Article originally published by the author at Hubpages.com on 07/27/09)

Articles of interest

Bedroom Design Ideas for Stylish Bachelors Who Love Their Privacy

There is something undeniably refined about a well-designed bachelor bedroom. It is stylish, masculine, and designed with intention. It is spotless and clutter-free, with every object in its designated space. It has a strong and personal style. Why? Because the occupant is a guy who values his privacy and will not compromise on comfort. His bedroom is more than a place to sleep. It is a retreat that reflects his character.

Image: Created by viryabo@polyvore


What Makes a Man’s Bedroom Stylish?

A man’s idea of style is rarely complicated because he chooses things that match his vibes and personality. But first, functionality takes precedence. Aside from these, he knows what he likes and chooses accordingly.

Apart from the essentials: a bed, dresser, nightstands, and perhaps an accent chair, what makes his room tastefully styled? It's in the details, the seemingly small (but effective) touches that bring life into the room.
  • One bold piece of wall art or a small cluster of black & white framed photos.
  • Personal mementoes and keepsakes like trophies, plaques, medals, and awards.
  • A proudly displayed sports jersey.
  • An occasional chair with suede or leather throw pillows.
  • A runner or area rug with bold geometric lines, abstract art, or textured patterns.
  • A table/display shelf with small collectables that tell stories.
  • Materials like leather, dark wood, or metal. While leather connotes power, resilience, and sophistication, dark wood is classic, impressive, and bold, and metal is modern, sleek, and masculine.
The top color choices are grey, navy, white, brown, black, deep plum and steel blue.

With carefully chosen and well-placed elements, a man can turn his simple room into a lived-in masculine haven that is stylish without being showy and personal without being crowded.


Some Furnishings You'll Find in a Man's Stylish Bedroom
Image: Created by viryabo@polyvore


Privacy, Style, and Masculinity


So, what are the benefits of a thoughtfully designed room? And why will some men never settle for less? Here are some reasons why:
  1. They have total control over their space.
  2. They have the freedom to design and furnish as desired.
  3. They have a clutter-free, calming, serene, and orderly comfort zone.
  4. There is nobody around to disorganise the space and disturb its serenity.
  5. Everything object, no matter its size, has its place.
The bachelor's bedroom should be his kingdom, a place to live the single life in style. It must be private. It should be stylish. It must ooze masculinity. But best of all, personal.

50+ Creative Men's Bedroom Decor Ideas (Video)


Being a bachelor means having the space to fully express who you are, in the way that feels right to you. When your bedroom reflects your confidence and taste, you don’t just sleep better — you live better.

Now, tell me, which bachelor won't desire a great and enticing bedroom design that sends out a statement of pure untainted masculinity?
 

Posts of Interest

African-Themed Ethnic-Style Interior Design Idea

African-styled ethnic interior design in modern-day home styling is often associated with exotic interiors. The style is embraced by creative and artsy people who love ideas that make them stand out "from the crowd".

An ethnic-style interior setting.
(Image used under license from 123rf.com)

Ethnic interiors are associated with bold patterns, textures, vivid earth tones, unusual forms, artwork, and some eccentricity.

Many believe ethnic designs are tribal. While many more think tribal designs connote ethnicity. They are all right in many ways. How? The ethnic decor is a beautiful mix of tribe, tradition, art, nature, and the elements.

How to Transform a Room Into an Ethnic Haven


Transforming an interior space into a stylishly-ethnic haven from scratch is simple. It is fun to put together because there are no rules per se, only three basic requirements typical of the theme.

  1. Natural (plants, jute, clay).
  2. Traditional (wood, fabrics, furniture).
  3. Art (carvings, sculptures, local art, handmade crafts, animal prints).

The requirements reflect the African cultural identity and traditions.

Assuming you already have the basic furniture all set in place: sofa, coffee table, armchair, side tables, dining set, etc., add some of the listed to enhance or upgrade the space to an ethnic-styled interior:

  • African tribal mask (one large piece or a group of three smaller ones).
  • Wall-hung talking drum.
  • Handwoven rug with a tribal pattern.
  • Large floor pillows (for sofa) - a mix of plain textured fabrics and African prints.
  • Leather pouffes (footstools).
  • Planters (terracotta, rattan, handwoven baskets).
  • Display wood carvings, stone sculptures, and other small-size artefacts on surfaces (tables, stands, floating shelves).
  • Faux animal skin throws.
  • Large brass, copper, or clay urns.
  • Lampshades (made from local Ankara or loom-woven fabrics).

Bedroom design with a touch of ethnic.
(Image used under license from 123rf.com)

If the room is already styled contemporary (or modern), you can add tribal accents and complements. Add at least five items to create an aesthetically pleasing ethnic interior decor. This type of mix with a modern style works best for most.

Going totally ethnic may end up looking consuming and overwhelming. But there is no rule against going the whole nine yards. Some like it that way.


African-Inspired Home Decor (Video)


Articles of Interest

Do You Live in a One-Bedroom Apartment? Here are 5 Quick Interior Upgrade Ideas

Some residents living in one-bedroom apartments do get tired of the same interior arrangement, year in and year out. Why? Because the apartment is small and the movement path is short (just between the living spaces and bedroom), it soon gets uninteresting.

Feature wall and a study desk for a small apartment.
(Image used under license from 123rf.com)

When you start to feel this way, it is time for a quick and affordable interior upgrade. So, how can you achieve this fast and easy without spending more than a few dollars? Here are five ways how:

1, Foliage


Adding potted plants to a room brings the outdoors into an interior space. You can use either natural or faux plants. If you have good natural light filtering into the space, go for natural foliage. And for a living area that lacks much natural lighting, faux plants are best. Place a large potted plant in a conspicuous corner of the room. Add smaller or ornamental plants on shelves, mantelpieces, windowsills, and other available surfaces.

A large plant positioned beautifully.
(Image used under license from iStockphoto.com)

2, Area rug


If you can, invest in a new floor rug. Put a small console by the entrance and add a small-sized runner rug in front. A new, colourfully textured rug can have just as much of an impact on the space as a new sofa will. Alternatively, you can place the rug between the living and dining zones. It will visually separate both areas.

3, Change furniture around


Swap around furniture and decor elements instead of buying new items. For instance, you can switch the bedroom rug with your current living room rug. You can also bring the accent chair from the bedroom to the living room and replace it with one of the armchairs from the seating area. That is two room upgrades for zero dollars.

4, Window art


Window art will transform any interior space, making the room appear like you are looking at some beautiful scenic view through your window. View a garden, a patio pool, a seascape, or a mountainous landscape with window decals. This change works well if you have a miserable view from the inside.

5, Create a feature wall


Never underestimate the transformative powers of framed pictures, illustrations, and paintings. Choose a wall as the room's focal point and turn it into a picture gallery. Paint the wall a different colour from the others. Paint is cheap, fast to apply, and very effective. Since you are painting only one wall, invest in a colour that works fabulously with the rest of the interior.

Do-It-Yourself Project


All in all, these five tasks are doable in an hour or thereabouts. You can do them one evening after work, or on a weekend.

And money spent? It will always depend on you.

For instance, you may wish to splash out on the area rug. Or you may decide to splurge on potted plants or a striking floor lamp.

The idea behind this post, however, is to help you achieve a fast, easy, and affordable way to upgrade your interior when you start to get tired of its looks.


Articles of Interest

Before You Design Interior Spaces, Do This Important Thing First

Before interior designers begin to create a concept and prepare preliminary drawings, they must first decide on a theme. The professionals know a good design starts with a theme. 

The style of choice can range from minimalist to elegant country, eclectic, contemporary, ethnic, Art Deco, traditional, feng shui, etc. Once this is ascertained, the interior design process can begin.


A living room theme.

A stylish theme for a living area. (Image used under license from 123rf.com)

They then begin the technical aspect: sketch floor plans, elevations, furniture placements and 3D representations. Furnishing, finishes, and other elements are noted.

But if you plan to upgrade a space or give your interior a makeover, employing the services of a professional interior designer is pricey and in many instances, unnecessary. Why? Because you can do a lot of the tasks required, yourself. You don’t need professional skills to apply clever and transforming interior design tricks.

Choosing a Theme

You should pick a theme with a lot of thought. But the good thing? There are no rigid rules concerning choices.
  1. Do you live alone or live with a partner?
  2. Do you have young kids still scampering around?
  3. Is your home full of occupants?
  4. Are you ready to ensure that you can maintain the aesthetics of the style?
If you have a sense of designing and decorating, then, go ahead and create a unique theme; a mix of the old and new works great. Combine no more than two themes (except for eclectic styling). Anything above that will be an overkill. But make one more dominant over the other. 

For example, a dominant modern theme with splashes of vintage-inspired elements will give a striking look. You'll love the nobody-else-has-this-style feel.

Plan to use elements that'll enhance your theme. Think finishes (floor, walls, and ceiling), colour scheme, artwork, textiles, patterns, and textures. There are also window treatments, lighting, and decor items that translate the theme perfectly.

Hire an Interior Designer or DIY?

After you've decided on a theme and (importantly) your colour scheme, you can begin your upgrade/makeover project. A good thing, we now live in a DIY era, so you can be your own interior designer and save tons of money.

Of course, there are certain tasks you cannot implement without contractors. For instance, if your upgrade requires some wiring, you need a licensed electrician. And if it involves a kitchen upgrade, you'll need a licensed plumber. You may hire one from your local home improvement store. 

Work at your own pace. Know what you can do and hire someone to do what you can’t. And if you don’t have that lump sum of money available, you can do your interior design work in phases.

7 Timeless Themes for Your Home (Video)


Articles of interest

Design Interior Spaces

Looking for a Creative Headboard Idea? Use a Statement Piece as Your Bedhead.

Using decorative metal (or wood) art is another creative headboard idea.
Using decorative metal (or wood) art is another creative headboard idea. 
(Image created by viryabo@polyvore)


Would you like to own an impressive headboard without breaking the bank? A statement piece that ups your bedroom aesthetics and creates a focal point for the room?

Today, the average cost of a not-so-great headboard can run into hundreds of dollars. Nothing eye-catching or unique either. Just some plain old wood (or upholstered) bedhead style.

Now, let's talk modern, abstract, and creative, something artsy and conversational - metal art headboard.

This may be more expensive than using drapes, decals, or upholstered panels but it'll give you a fantastic dramatic look.

Metal art ideas range from simple wirework and rod configurations to intricately sculptured sheet metal artworks. It can be installed on the wall above the bedhead position at least 18 inches above the mattress.

If you have an eye and feel for design, browse online shops (eBay, Amazon) garage sales, or local (flea) markets. You'll be pleasantly surprised to see cheap/affordable finds you can improvise and turn into headboard features.
 

Tips
  • Allow the artwork to span the bedhead and bedside cabinet positions.
  • Use abstract or free-form designs to create art forms.
  • For a distinctive look, use metal-framework with shatter-proof mirror insets.


(This blog post is culled from an originally published article by the author on Discover.HubPages in 2013) 

*If you like this post, and find it beneficial or interesting, kindly share it on social media. It will be greatly appreciated
 :)