Showing posts with label INTERIOR ACCENTS. Show all posts

Why Moody Wall Art Makes a Home Feel Layered, Beautiful, and Timeless

Moody illustration art is artwork with a darker, emotional, and atmospheric feel. Instead of bright colours and playful designs, this style focuses on depth, shadow, texture, and quiet drama. It is the kind of art that instantly makes a room feel more sophisticated and collected with time.

Rather than screaming for attention, moody wall art creates a calm and quietly powerful presence.

Misty mountains and stormy waters (AI-generated image).

What Makes Art Feel “Moody”?


Moody illustrations usually include:
  1. Deep or muted colours.
  2. Soft shadows and dim lighting.
  3. Vintage-inspired details.
  4. Textured, painterly effects.
  5. Mysterious or romantic themes.
The overall aesthetic is often emotional, nostalgic, dramatic, or slightly gothic, like:
  • Candlelight instead of sunshine.
  • Stormy skies instead of tropical beaches.
  • Old libraries, antique frames, and faded oil paintings.

Common Types of Moody Illustration Art


There are many styles of moody artwork, but some of the more popular examples are:

Dark Florals

Rich roses, wilted flowers, or dramatic botanical prints with deep reds, blacks, and earthy greens.

Stormy Landscapes

Rainy forests, foggy mountains, cloudy coastlines, or dark countryside scenes.

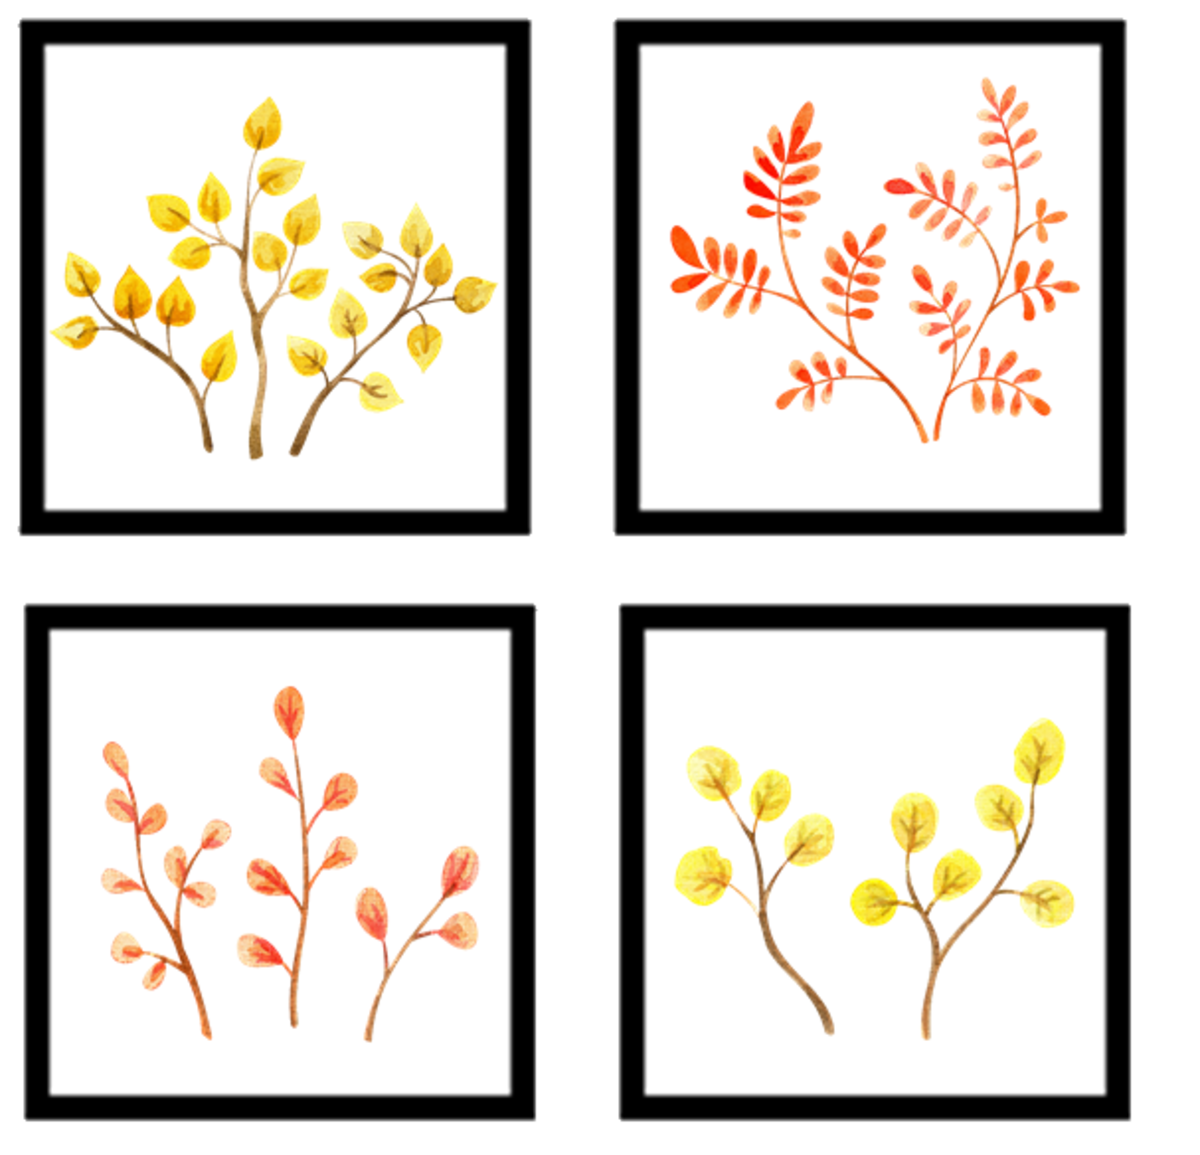
Antique Botanical Sketches

Vintage plant drawings, with faded paper textures and old-world charm.

Ravens and Crows

Bird illustrations are common in moody art because they add mystery and a gothic feel.
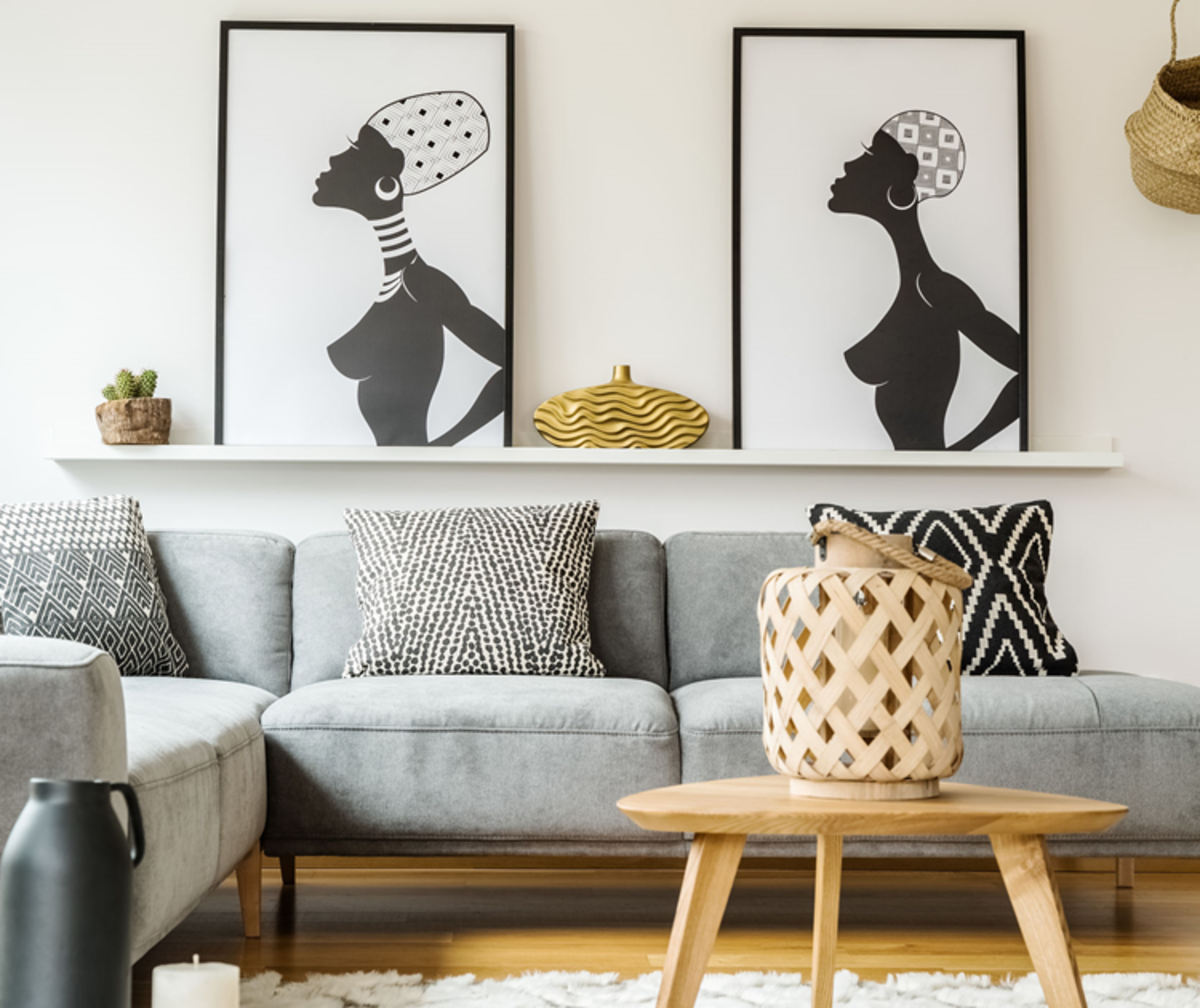
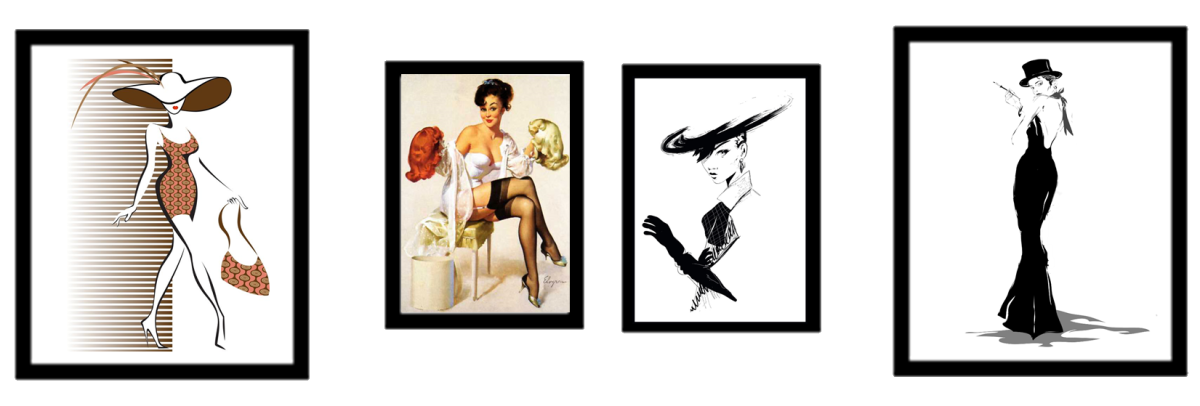
Faded Portraits

Vintage-style portraits with soft shadows and muted tones create a timeless feeling.
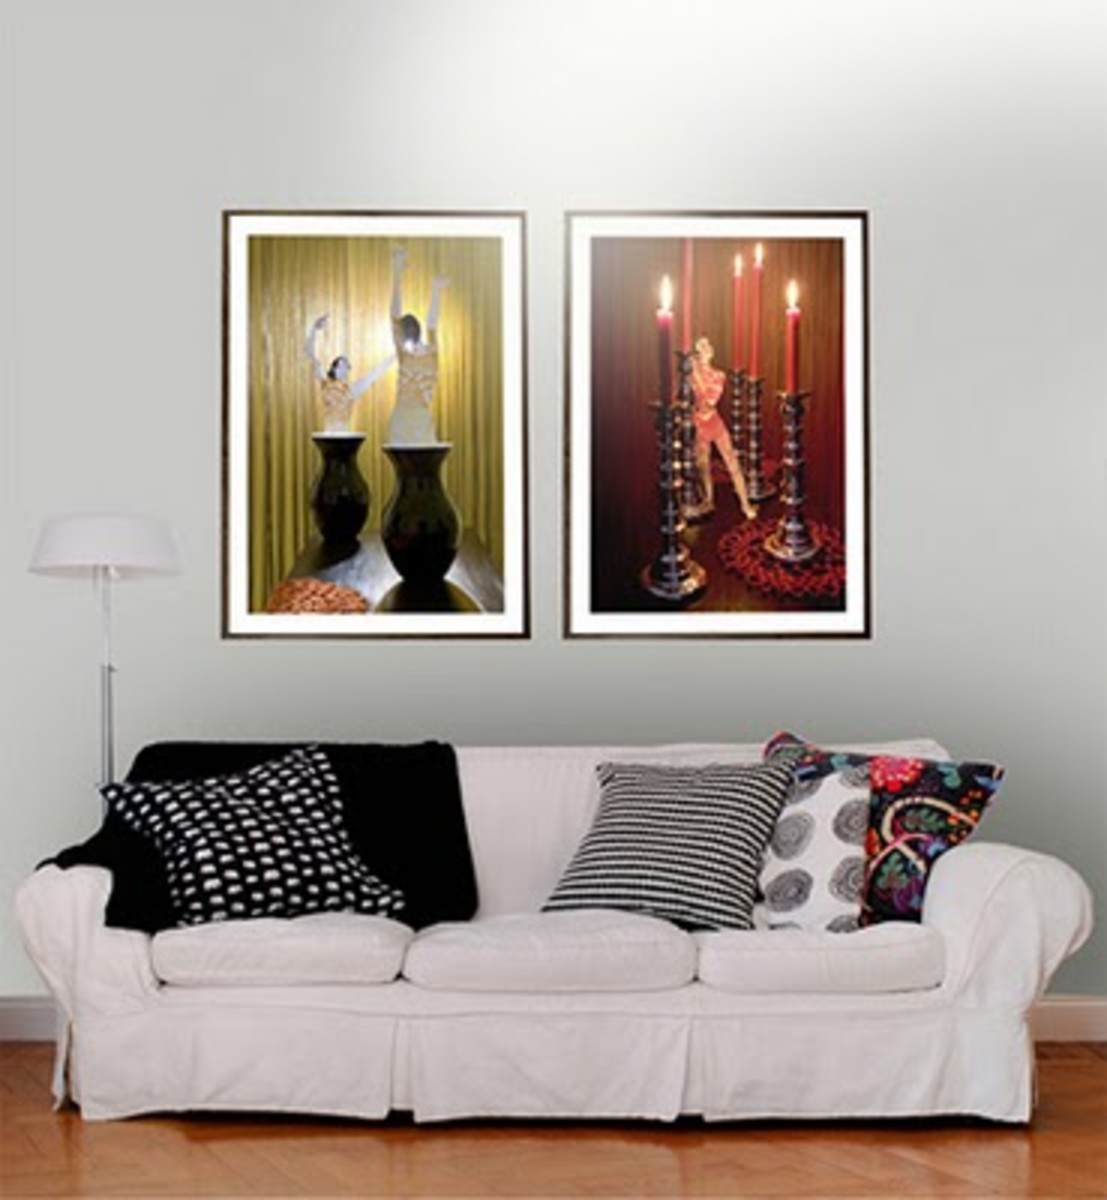
Candlelit Scenes

Warm, glowing flame-lights set against dark backgrounds that instantly add atmosphere.

Why Moody Art Works So Well in Interior Design


Moody illustration art does more than decorate a wall; it instantly changes the feeling of a room. This style of art helps interiors feel:

Warm
Cozy
Sophisticated
Dramatic
Personal
Collected over time

Even a modern room can feel warmer and more interesting with darker, moody artwork, and that's why they work beautifully in:


The Secret Behind Moody Interiors


The best moody interiors are not loud or overwhelming. Rather, they feel noiseless and dramatic. Instead of using bright colours everywhere, these interior spaces rely more on texture, shadow, depth, and contrast to create beauty. 

Moody illustration art plays a huge role in that atmosphere. For instance, a single dark floral print or stormy landscape can completely change the theme and personality of a room.

How to Style Moody Illustration Art


If you want to try this, look in your own home, start small. You can do that by:
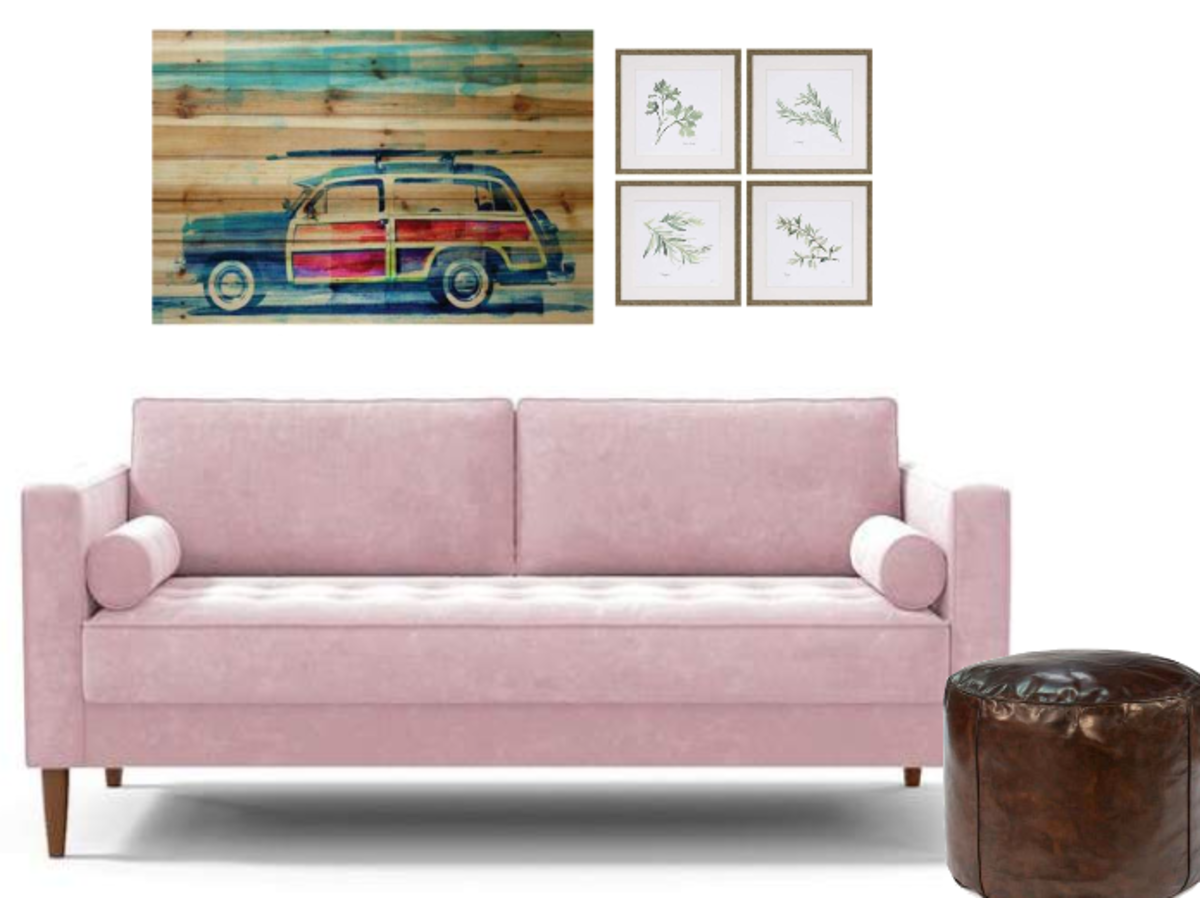
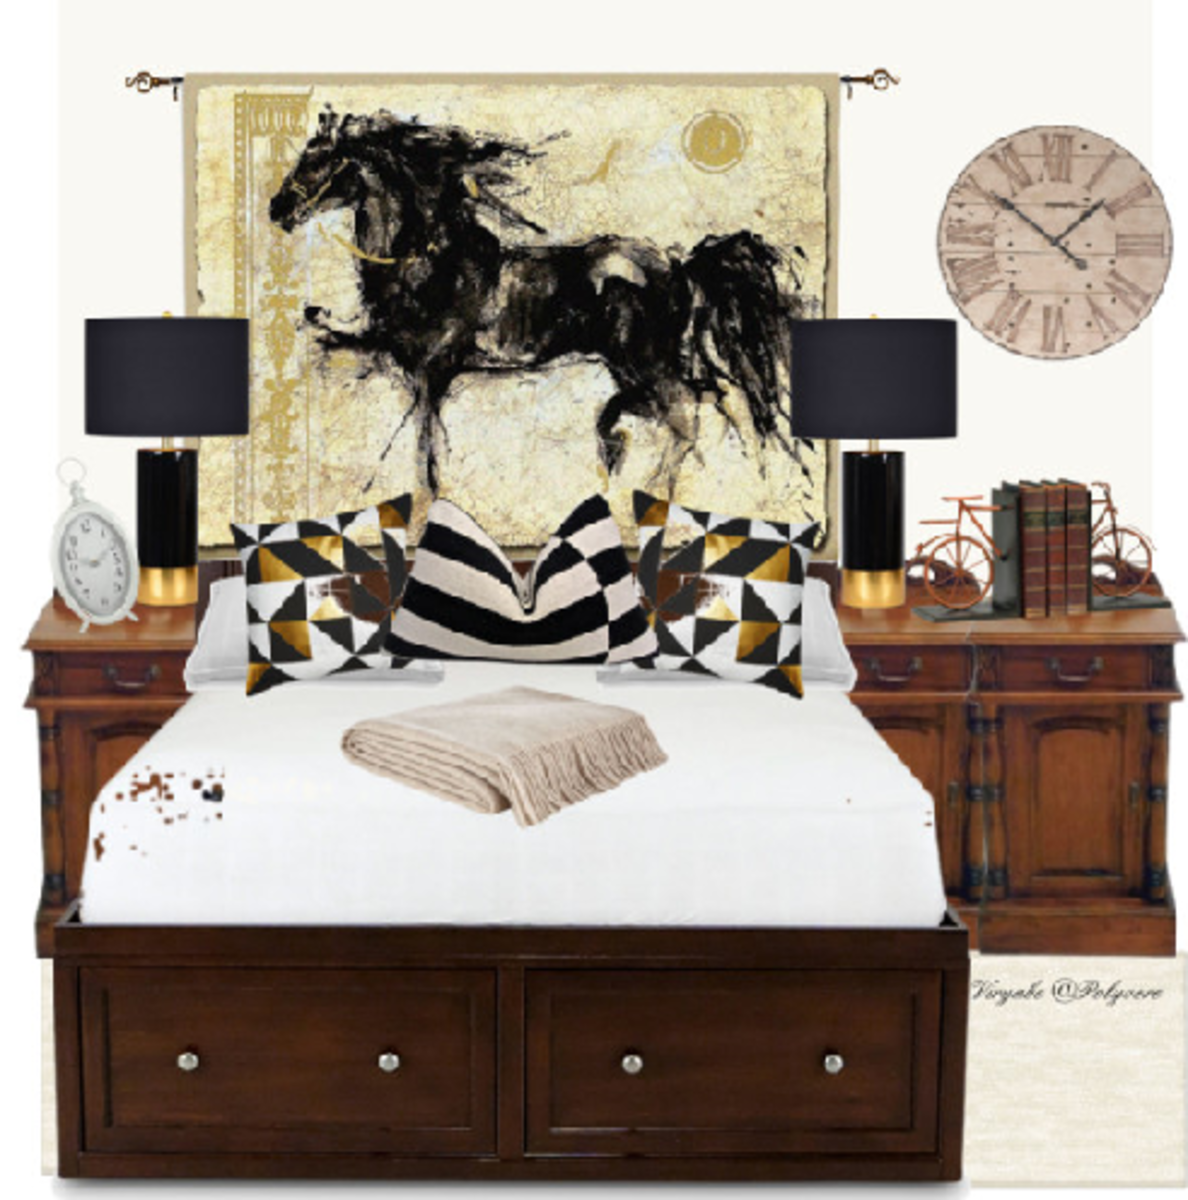
  • Adding one large dark art print above a sofa or bed.
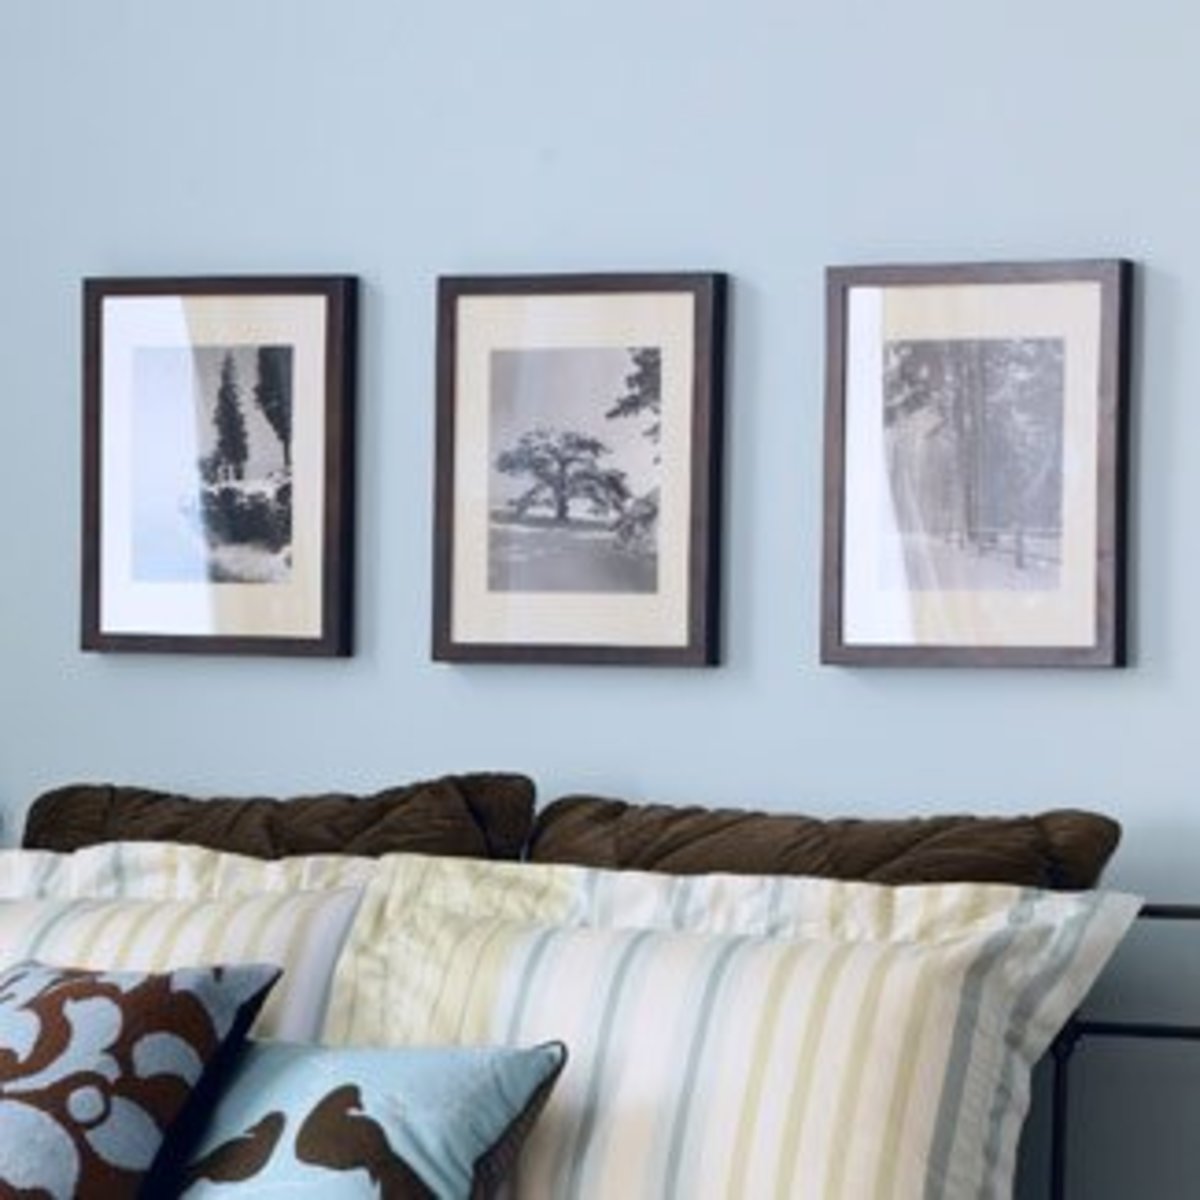
  • Mixing vintage frames with modern furniture.
  • Layering darker artwork with warm lighting.
  • Combining moody prints with candles, books, and textured fabrics.
The goal is not to make a room gloomy but to create warmth, depth, and character.

Moody illustration art proves that darker artwork can still feel beautiful, elegant, and inviting, because it brings emotion, atmosphere, and timeless charm into a space in a way that bright, playful art often cannot.

If you love interiors that feel cosy, dramatic, artistic, and layered, moody illustration art may be exactly the style your walls have been missing.

For a beautiful curated collection of moody art paintings and illustrations, visit my listing: Dark Landscape Art with Old-World Charm

Other Articles of interest 

Peel and Stick Wall Decals That Look Like Expensive Wallpaper

Most people think transforming a wall means painting, papering, stuccoing, or spending lots of money on a decorator. It doesn’t. 


Peel-and-stick wall decals have come a long way, and the best ones genuinely look like something a professional picked out and installed. They go up in minutes, come off without damaging your walls, and cost a fraction of what real wallpaper would. Here are five picks that prove it.

Cherry Blossom Branch Decals


This is the one that stops people in their tracks. A large-scale nature scene with delicate cherry blossom branches, colourful birds, and hanging birdcages applied directly to your wall looks like a hand-painted mural. The kind you’d see in a boutique hotel lobby, or a carefully styled sitting room. It is self-adhesive, easy to reposition, and costs nowhere near what a mural artist would charge.

Boho Gold Leaf Decals


Rich dark tones with gold botanical detailing. When these are applied to a feature wall, most people assume it’s expensive wallpaper. The gold leaf styling gives it that luxurious, high-end feel that works especially well in a bedroom or dining area. If you want one decal that makes the biggest visual impact, this is the one.

Large Winter Tree Decals


These dramatic bare-branch tree decals create an incredible atmosphere, especially styled alongside a fireplace or a reading corner. The large scale is what makes them work. Small decals add a touch; large ones transform the entire mood of a room. This set does exactly that, and can be up in minutes.

Terracotta Double Arch Decals


Arched shapes are one of the biggest trends in interior design right now, and this set brings that look to any plain wall, without any builder's work. The warm terracotta tones work beautifully behind a desk, a bed, or a sofa. It gives the impression of an architectural detail, the kind that looks like it was always part of the room.

Wildflower Botanical Stickers


These neutral, meadow-inspired wildflower decals look like hand-painted wallpaper. The soft, organic shapes and muted tones make them incredibly versatile. They work in bathrooms, bedrooms, hallways, and nurseries. Up close, they look artisan, and from across the room, they look like wallpaper that costs a lot of money.

The Rule That Makes Them Work


The difference between a decal that looks cheap and one that looks expensive usually boils down to placement and scale. Choose a single focal wall rather than covering the four walls of the room. Pick a style or theme that matches your room’s existing colours and mood. Do those three things and almost any quality decal will look intentional and considered.

See All the Picks


I’ve curated the full collection, including every decal mentioned here plus framed printable art options, in one easy browsing list.

5 Home Decor Pieces That Look Designer But Cost Almost Nothing

You’ve walked into someone’s home and thought, “How does it look so put-together?” Chances are, it wasn’t money. It was placing the right pieces in the right places, and the good news is you can do the same thing, get the same effect, and spend very little doing it.


Here are 5 home decor pieces that look far more expensive than they are.
 

1. A Sculptural Table Lamp


Lighting is the fastest way to make a room feel designed. A lamp with an interesting shape (think hand-painted glass, terrazzo, or a carved base) adds warmth and a creative touch that feels intentional. It is the kind of piece that makes guests ask, “Where did you get that?” You can find stunning options on Wayfair for under $60. One standout pick is on my Benable list: a hand-painted aqua & cream teardrop lamp with a gold base that looks like it belongs in a boutique hotel.
 

2. A Statement Decorative Mirror


A good mirror does three things at the same time. It adds light, makes a room feel bigger, and acts as wall art. An organically shaped mirror in mango wood, or a round mirror with a scalloped walnut frame, gives you that designer-curated look for a fraction of what you’d pay in a home store. Hang it above a console, a dresser, or a sofa, and watch the whole room shift in aesthetics.
 

3. A Decorative Cushion Cover in Velvet or Embroidery


This is the easiest swap you can make. Pull off your plain cushion covers and replace them with velvet, embroidered, or printed ones. Your sofa will instantly look completely different.
  • Rich jewel tones
  • Forest green
  • Burgundy
  • Teal
These are colours that instantly add depth. An embroidered floral design on natural cotton looks artisan and considered. You’re spending a few pounds on a cover, but the result looks like you spent a lot more.
 

4. A Vintage-Style Decorative Mirror


Yes, mirrors get two spots on this list because they are that good. A small oval antique gold mirror, handcrafted using a traditional sand-casting method, looks like a genuine flea-market find. It brings character, texture, and old-world charm to a gallery wall or over a small entryway shelf. Pieces like this are what make a home feel curated rather than just furnished.
 

5. A Bold Printed Cushion Cover


A maximalist cushion, like a peacock print on velvet with fringe trim, or a painterly horse design in cobalt blue, works as a statement piece all on its own. You don’t need to redecorate. You only need one cushion that draws the eye and changes the energy of the room. That’s what designers do. They pick one bold thing and let everything else stay calm around it.
 

Where to Find All Five


I’ve pulled together my favorite picks for each of these in one place. You can browse the full list, including specific product links, right here: Home Decor Items That Look Expensive But Aren’t (one of my Benable lists). Every piece was chosen because it genuinely looks more expensive than it is.

Wall Hanging Ideas for Framed Pictures, Artwork, and Paintings


Wall hangings look delightful in all interior spaces, 
especially when arranged asymmetrically.


Are your indoor walls devoid of wall hangings or other wall decor that can complement your interiors? Are you planning to add style to your walls using framed art, but don’t know how to, or where to start? If your answer is yes and yes, this article is for you. 
We all have artworks, pictures, illustrations, photographs, hand drawings and doodle art stored somewhere within our homes. But many of us don’t realise we can turn these stashed-away possessions into interior décor elements that will stylishly uplift our interior spaces.

There is so much you can do with these hidden treasures. You can frame and hang them in many beautiful ways, and there are many hanging methods to achieve this. The good thing is that there are no hard and fast rules about how you wish to arrange them on your interior walls.


7 Tips for Hanging Wall Art


There are many creative ways of hanging artwork and framed pictures on your interior walls. While wall art must look organised whichever way they are arranged on a wall, there is no hard and fast rule as to how it should be laid out.

Interior designers and home decorators can usually tell the types of artwork that go well with the themes of their interior projects and are quite adept at arranging art in aesthetically pleasing and effective manners.

But you can, too, because there are no rules cast in stone on how to hang art. There are a few basic principles that represent what is desirable to different people, however.

So, what are the best or most creative ways to hang art or framed pictures? The answer is that it depends on:

  1. Size of the wall.
  2. Shape of the wall.
  3. Wall height.
  4. The wall position.
  5. Available wall space.
  6. A backdrop or a feature wall.
  7. Colours/style/size of picture frames

Size of the wall:

Your wall size will determine how you hang wall art. If you have a narrow wall with a low ceiling, for instance, you don’t want to hang an overtly large painting that swallows up the wall.

Shape of the wall:

If you have a triangular wall (typical wall shape found in A-frame homes) or a square wall, you will hang artwork differently on the two walls.

Wall height:

For interiors with high ceilings, for instance, you want to hang paintings that are proportionally balanced with the wall’s character. You don’t want to install a couple of small framed artworks that will visually disappear on high walls, nor do you want to hang oversized wall art on low walls.

Wall position:

Awkwardly positioned walls can be a bit tricky. The best way to decorate such walls, for instance, the walls of a niche, is to go the gallery arrangement way. You can extend the gallery of small framed pictures into the corners to help the stark lines of the niche appear to disappear.

Available wall space:

How much wall space is available for hanging your artwork? If, for instance, you live in a tiny apartment and can’t seem to find space for your art, hang your art as a column of art that spans from below eye level to above eye level, about 2ft away from the ceiling. Ensure they are the same small-sized framed works.

Backdrop or a feature wall:

If you don’t have a feature wall, you can create one with wall art. Depending on the size of the wall, you can go for a one-piece framed art, a standalone tapestry, or a series of artworks like a collage of art or a collection of framed black and white or sepia photographs.

Colours/style/size of picture frames:

Picture frames come in all conceivable colours, different styles and sizes. Depending on the design theme and the interior colour scheme, you can base your choice of frame style on anything that ranges from vintage-inspired to modern picture frames constructed from man-made materials.


Dramatic display of large-sized framed wall art with tribal illustration.
(Images used under license from 123rf.com)

Picture Hanging Ideas


Symmetrical vs. Asymmetrical Arrangement


Many homeowners feel much more comfortable using a symmetrical picture hanging arrangement. They think it is safer to keep within the conventional ways of hanging artwork, and there is absolutely nothing wrong with that.

But you can also go for an asymmetrical arrangement if you want something unique and different from the norm. An asymmetrical arrangement includes using different sizes, styles, and colours of picture frames, all arranged haphazardly on a wall.

For wall art to stand out conspicuously within the room's decor, it's best to have plain, neutral wall colours. If you must have striking, vibrant colours, let them be a part of the artwork.

It is best to relate the subject matter of the artwork to the character and theme of the room.

Create colour accents on one wall with framed paintings or photographs. Use different colour frames for each picture. This can be a feature wall that is set in harmony with the general interior design. 

For a modern cluster arrangement, artwork must not be arranged indiscriminately, but rather, in the form of simple geometric patterns:
  • Triangle
  • Square
  • Line
  • Rectangle
  • Diamond

TRIANGLE


SQUARE


LINE


RECTANGULAR


DIAMOND


Other Artwork-Hanging Considerations


For different themes, shapes and sizes of art hung on one wall (posters, pictures, photographs, wall art), set them close in a mass arrangement. This makes the entire wall look like a beautiful scenic view.

Hang one large painting on the most significant wall in a room. At times, interior walls with too many wall hangings can be stressful and heavy on the eyes, especially if they have ornate frames.

If you have rooms with heavily decorated walls like scenic images, patterned wallpaper, special paint effects, murals, etc., do not hang framed art in them, because the paintings will end up being lost in the busy background.


Tip:
  • Pictures and framed artworks can be hung on wall surfaces using hooks, nails or screws driven well into the wall. They must be fixed near the top of the picture frame. This ensures that the picture is hung as flat as possible against the wall surface.

This picture hanging idea has a symmetrical arrangement. 
It works as the sofa's backdrop. A simple, eye-catching arrangement


A creative way to hang a standalone tapestry art.
It serves as a piece of decoration, a one-piece wall art.

Do's and Don'ts of Artwork and Picture Hanging


Do's
  • Groups of three pictures could either be hung with the largest in the centre or two of the same size on both sides of the third. It is good if the three artworks are related in character and colour scheme.
  • Small pictures look better when hung at eye level.
  • Larger paintings that will be viewed from a distance are best hung at a higher level.
  • A group of artworks arranged asymmetrically can be placed on wall surfaces that are not the central point of the room.
  • Make sure that hanging artwork ropes or wires do not show when paintings are hung on the walls. It looks so tacky when hanging elements become obvious.

Don'ts
  • Do not hang oil paintings and watercolour paintings near each other. It will become unharmonious unless they are similar in colour tones.
  • Hanging artwork with vibrant colours next to black-and-white sketches is inappropriate. They must not be placed close together on the same wall to avoid a situation that's odd and inconsistent with picture-hanging styles.

A simple picture hanging idea using three framed pictures/paintings, 
all set out in a straight line.

Browse more posts in Interior Accents for more decorating ideas.

Decorative Metal Art in Interior Design: Interior Décor Uses of Timeless Metals

Decorative metal artworks are functional and ornamental pieces made from metals and shaped by casting, hammering, stamping, or forging.

In interior spaces, these beautiful metal works can be used as visual contrasts, working well in modern, industrial, classic, and eclectic interior designs.


Types of Metals Used in Decorative Art


1. Iron

Iron is valued for its strength, structure, and sculptural presence. Unlike steel and stainless steel, its malleability makes it a preferred choice for interior construction and décor pieces. Decorative features made from iron include:
  • Wrought iron wall grilles.
  • Staircase balustrades and railings.
  • Iron-framed mirrors.
  • Decorative fireplace screens.
  • Sculptural accents.

2. Tin

Lightweight and easy to shape, tin has long been used for stamped and painted decorative metal art, especially wall art pieces. Decorative pieces made from tin include:
  • Wall plaques and decorative signs.
  • Decorative ceiling tiles.
  • Embossed tin mirrors.
  • Hanging tin ornaments.
  • Wall sculptures made with recycled tin.

3. Copper

Copper’s warm tone and workability make it one of the most versatile metals used in decorative art. It can be hammered, cast, or left to develop a natural patina. Interior décor items made with copper include:
  • Polished copper wall panels and art tiles.
  • Sculptural lighting fixtures.
  • Decorative vases and urns.
  • Copper screens and room dividers.
  • Statement coffee table (and other surfaces) centrepieces.

4. Bronze

Bronze is the most widely used metal for cast decorative metal art. It is durable and easily etched with fine detail. It is a great addition to both classical and modern interiors. Some interior décor items made with bronze are:
  • Sculptured figurines.
  • Busts and abstract statues.
  • Decorative bowls and plates.
  • Accent hardware, like knobs and handles.
  • Console or pedestal display sculptures.

5. Brass

Soft, malleable, and highly decorative, brass features bring warmth and reflective elegance to interior design. Although brass requires occasional maintenance, its reward for visual richness is unsurpassed. Decorative items made from brass include:
  • Wall art panels.
  • Decorative door knockers and handles.
  • Furniture accents and trims.
  • Candleholders and sconces.
  • Statement mirrors with brass frames.

6. Lead

Although lead is no longer widely used, it still appears in traditional and antique decorative metal art. It is valued more for form than for durability. Interior décor items made from lead include:
  • Stained glass lead cames (narrow strips of lead used to join pieces of glass in stained glass work).
  • Decorative lead planters.
  • Antique lead figurines.
  • Architectural detailing inserts.
  • Historic wall relief accents.

Metals: Bringing Visual Aesthetics to Interior Design and Decoration


Decorative metal art remains an essential element in interior design because it combines permanence with artistry. Whether iron for structure, copper for warmth, or bronze for sculptural impact, each metal adds a distinct visual language to interior spaces when used thoughtfully and intentionally.


Browse more posts in Interior Accents for more decorating ideas.


Articles of interest

Soothing Interior Spaces: How Indoor Water Features Enhance Wellness and Decor

Indoor water features serve more than aesthetic purposes. They are calming, soothing, and therapeutic elements within the home, with beneficial effects on emotions and well-being, radiating serene energy to the home occupants.


They come in various forms and sizes and are made from different materials like terracotta, bamboo, metal, glass, ceramic, stone, and acrylic.

Therapeutic Qualities of Flowing Water


Water represents prosperity, and its gentle sounds serve as energy boosters. It gently filters out disturbing noises and eliminates energy-sapping background sounds that disturb peace and concentration. With it gently moving and cascading, it has an amazing effect on our well-being.

Indoor Waterfalls as Flowing Art


Indoor water features possess a decorative and dramatic effect, and if carefully selected and positioned correctly, fit in perfectly with both contemporary and traditional settings. They are an eye-catching addition to any interior space, but there are no hard and fast rules on where to position them. How and where you place them depends on your taste and creativity.

Types of Fountains You Can Use Indoors


For the classic traditional look:
  • Rustic traditional fountains made from natural materials like fired clay, bamboo stems, copper, steel, slate, and granite are popular choices.

For a modern, contemporary feel: 
  • Features made from man-made materials like PVC, glass, fibreglass, and simulated components, including new-age materials.

The three main types of indoor water fountains are:
  1. Standalone (free-standing).
  2. Wall-mounted.
  3. Tabletop (counter/surface placement).

Free-Standing

Great if you have ample floor space. Free-standing floor fountains are spectacular to look at. They are usually larger and heavier than wall-mounted indoor fountains and come with sturdy bases that encase their water reservoirs. They are produced from various materials, both natural and man-made and can include extras like underwater lighting.


Wall-Mounted

Wall-mounted fountains come in various designs and forms. They have high visibility and take up zero floor space. Wall-mounted water features project no more than 3 inches from a wall. A great idea if you lack ample floor space.


Tabletop

Tabletop types are the smallest and lightest and, just as their name suggests, they can be placed on a table, desk, counter, floating shelf, ledge, or display stand. There is a great assortment of designs, forms, sizes, and materials for these interior water features, much more than is available for the wall-mounted and free-standing ones.

Where to Place These Decorative Features


Indoor water features can be used in both residential and commercial interiors. They can be a part of the interior design process of homes, offices, clinics, spas, hotels, recreational clubs, restaurants, and other similar establishments. You can use them in:
  • Entrance hallways
  • Foyers
  • Reception areas
  • Offices
  • Enclosed patios
  • Waiting rooms
  • Living rooms
  • Bedrooms
  • Study
  • Niches and alcoves

Because of its natural elements, they represent living art pieces that stylishly accentuate interiors.

5 Examples of How to Use Water as an Element of Décor


Room divider.

An open space can be partitioned into zones with standalone floor features. For instance, to divide an open living/dining area space into two distinct spaces, use a tall fountain (up to 3’6” or 1.06m).

Focal point.

Install a wall unit in a strategic position to serve as a focal point.

Dramatic centrepiece.

A tabletop centrepiece with a sturdy base, cascading water, and small scented candle lights placed in its pool will make a great centrepiece.

Sleeping aid.

The quietly flowing sounds and ripples are relaxing and tension-relieving and will lull you to sleep, especially for individuals who find it hard to fall asleep at night.

Humidifier.

As water moistens the atmosphere, so do indoor water features humidify interior spaces, helping to increase the elasticity of the respiratory walls and keep the skin moisturised and supple.

Where Design Meets Tranquillity


Flowing water is therapeutic, so having water fountains (or waterfalls) gives you as much satisfaction in its beauty and complementing nature as it does health-wise. They not only serve as decorative features but also help relax, soothe, and calm you.


Browse more posts in Interior Accents for more decorating ideas.

(Article first published by the author on HubPages: 6/21/2010)


Articles of interest:
How to Develop an Interior Design Concept – 5 Basic Principles to Follow

Moss Walls: The Interior Design Trend of Bringing Nature Indoors

Moss wall installations are a 21st-century design concept that adds textured greenery to vertical structures of building interiors and exteriors.

Available as real or faux moss, it is a creative feature that adds a biophilic touch to interiors and architectural designs. (Biophilic design integrates natural elements into built environments.)


1. As a living wall art feature, its textured natural accent brings the outdoors indoors through a creative connection to nature.

2. As a sound barrier: Moss walls absorb sound waves and reduce noise levels. Think home recording studios.

3. As a natural element integrated into built environments, it adds a biophilic touch that creates environments that support physical, mental, and emotional well-being.

Real moss walls are low-maintenance. They are cost-effective and sustainable alternatives to potted plants, and depending on the strain used, they have a long lifespan (between 3 and 10 years). Its longevity depends on:

  • Type of moss.
  • Preservation method.
  • Moisture (misting).
  • Maintenance practice.
  • Good ventilation.

7 Examples of Where to Use Moss Wall Installations


1. Add a framed moss art piece as a headboard alternative.

2. A focal point in the entrance hallway.

3. Behind a floating staircase for a natural accent.

4. As sound insulation for a home theatre.

5. Incorporate moss tiles into a kitchen or bathroom backsplash.

6. A central wall in an office reception or spa lobby.

7. Behind the main counters of restaurants and cocktail bars.


Moss Wall Installations for Healthier Interiors


With their calming and ambient aesthetics, improved air quality, and eco-friendliness, moss walls promote great health and well-being to building occupants. They also enhance cognitive functions and elevate sinking and dreary moods. And in the workplace, biophilic design has been shown to increase productivity, creativity, and overall satisfaction. This makes the concept a popular choice for residential and commercial projects.

All these are achieved while adding a uniquely different touch of nature to their living and working spaces.


Looking for a Creative Headboard Idea? Use a Statement Piece as Your Bedhead.

Using decorative metal (or wood) art is another creative headboard idea. 
(Image created by viryabo@polyvore)

Would you like to own an impressive headboard without breaking the bank? A statement piece that ups your bedroom aesthetics and creates a focal point for the room?
Today, the average cost of a not-so-great headboard can run into hundreds of dollars. Nothing eye-catching or unique either. Just some plain old wood (or upholstered) bedhead style.

Now, let's talk modern, abstract, and creative, something artsy and conversational - metal art headboard.

This may be more expensive than using drapes, decals, or upholstered panels, but it'll give you a fantastic, dramatic look.

Metal art ideas range from simple wirework and rod configurations to intricately sculpted sheet-metal artworks. It can be installed on the wall above the bedhead position at least 18 inches above the mattress.

If you have an eye and feel for design, browse online shops (eBay, Amazon), garage sales, or local (flea) markets. You'll be pleasantly surprised to find cheap/affordable pieces you can improvise into headboard features.

   *Browse more posts in: Interior Accents for more decorating ideas.


Tips

  • Allow the artwork to span the bedhead and bedside cabinet positions.
  • Use abstract or free-form designs to create art forms.
  • For a distinctive look, use a metal framework with shatterproof mirror insets.


Articles of interest

Looking for Cheap Headboard Ideas? Try Wall Decals, Drapes, and Wallpaper


A creative faux headboard idea using wall decals. You can create any theme you desire to make the wall above your bed look stylish and impressive.
A creative faux headboard idea using wall decals. You can create any theme to make the wall above your bed look stylish and impressive.
So, how do you come up with impressive headboard ideas?
What can you use?
Is it an easy instal-it-yourself decor feature?

For a few dollars and a couple of hours of work over the weekend, you can style your bed and dress it up with a creative headboard feature that can become a focal point in your bedroom. For this affordable feature, use wall decals. Apply them on the wall above the bed where the headboard position is to create an elaborate (or simple) headboard effect.

1. Wall Decal Headboards

Wall decals (stickers) come in various styles, shapes, colours, and patterns. They can be anything from simple and whimsical quotes to very graphic designs with striking visual appeal: funny, inspirational, mood-enhancing, scenic, or dramatic. You can use any theme or create something unique that reflects your style.

Wall-applied stickers work well for almost any type of bedroom; adults, teens, or young children. While you can apply adult themes, mature quotes, or illusionary effects for adults, you can create faux headboards with pretty and colourful picturesque scenes, quaint patterns, or numerical and alphabetical arrangements for nurseries and young children. For teens and tweens, themes with their favorite rock stars, glow-in-the-dark, and vivid and cute patterns like butterflies, hearts, and rainbows. 

You can also create and design your own pattern by combining various decal themes.

How to Apply Wall Stickers

  1. Applying stickers directly onto the wall is simple and fast, but it is best to use removable stickers. This will allow you to change the look of your decal headboard as often as you wish.
  2. Cut out the shape and size of your preferred headboard from an inexpensive board like plywood or chipboard. Before you install it on the wall, apply the decals or stickers. It is easier to apply decal stickers when the board is flat on the floor.
  3. If you wish to apply them directly on a half, or three-quarter-inch board (before installing on walls), coat the board with a block of bright or muted paint. Ensure that its edges are lipped before painting. 
  4. Fix the finished product onto the wall with hidden screws.

2. Drapery-Style Headboards

Curtain ‘headboards’ are one of the cheapest and easiest to make. It is a task that will take you no longer than thirty minutes. You can use inexpensive fabrics or textile cut-offs for this headboard effect and hang them simply, just as you will drapes and curtains. 
Simple to sew and install window-type treatments can also serve as faux headboards.

For an aesthetically pleasing overall look, choose a material with bold patterns. Depending on the effect you wish to create, it should complement the bedroom’s colour scheme. You can hang them from the ceiling for a dramatic look. This works well for wide beds.  Styles to go for include Roman blinds, swags, pinch-pleats or swag and tails. 

How to Hang Your Drapery-Effect Headboard
To hang your finished product, attach a decorative curtain rod to any height (of choice) above the bed’s head, and simply hang your curtain; swags, blinds, pleated, ruffled or plain gathered drapes.
 

3. Wallpapered Headboards

If you seek a low-budget but stylish headboard look, applying wallpaper on the wall above the bed is worth considering. With thousands of patterns to choose from, wallpapered headboards bring so much personality into a room, and will enhance the bed in no small way.

Choose a wallpaper pattern that works well with the room’s colour scheme. If you plan to do a bedroom upgrade, you can start off by selecting a covering that has your favourite colour. You can pick out something quirky and colourful or a wallpaper design that is rich and regal. You can then pick out a colour from the wallpaper’s pattern and paint it on the remaining bedroom walls.

Wallpaper Headboards - Tips

  • Create a dramatic look with a floor-to-ceiling wallpaper headboard that spans the width of the bed.
  • Install textured fabric covering like velvet, damask, or animal print in place of wallpaper. This creative headboard idea will give your bed the illusion of grandeur.
  • Wallpaper can be applied directly on the wall. However, if you plan to use fabric, first apply the fabric to a ¾” board. Wrap the fabric around the edge and tack it in place at the back.
  • Before applying the wallpaper, make sure your bed is positioned in a place you're happy with because moving this headboard around once it’s installed can be a little tricky.

Articles of interest
Bed Headboards Made from Tapestry, Large Paintings, and Carpets
How to Make Area Rugs from Old Clothes
7 Ways to Change Your Living Room from Drab to Uplifting


(This blog post is culled from an originally published article by the author on Discover.HubPages in 2013) *If you like this post, and find it beneficial or interesting, kindly share it on social media. It will be greatly appreciated :)

Bed Headboards Made from Tapestry, Large Paintings, and Carpets

A wall tapestry that serves as a headboard. An impressive, unique, and stylish substitute for the conventional headboard styles.


There is hardly a bed without a headboard. With styles ranging from simple and basic to classic and traditional style headboards, you will find that there are a wide variety of designs to choose from, but great-looking headboards don’t have to be conventional and typical.

Headboards Made of Tapestries and Large Framed Paintings

Using wall tapestries as a headboard substitute is not only eclectic and dramatic, but it is also an inexpensive way of finding a substitute for the typical headboard designs.

Large paintings and prints, framed or unframed are also great headboard ideas. You can use one large painting, or a set of prints painted canvas panels, set and spaced to fit the width of the bed and its side cabinets.

Alternatively, you can install a wide painting or print with framing that matches the bed’s wood type.

Inexpensive tapestry makes a great one as well and because tapestry usually has a great ‘palate’, it goes a long way in determining a base colour for your bedroom’s colour scheme.

Not only do tapestry and paintings look and feel different, but their beauty will also make the total room decor appear expensive.

Carpeted Headboards

Carpet can serve more purposes than just flooring and can be used to fabricate a headboard. Because carpet is plush and soft to the hand, using it as a headboard makes for extra comfort if you like to sit up in bed. Adding extra pillows will add to the beautiful style and enhance your comfort.

You can use carpet tiles or carpet rolls and you will find them cheap to buy at discount stores or home improvement shops. You can create a simple square or a rectangular shape headboard, but if you are more adventurous, you can have an odd or asymmetrical-shaped one.

The choice of colour or pattern will depend on what you prefer but bear in mind that if the other room finishes are busy, you will need to go for a solid colour carpet. And if, for instance, your bedroom is set up in a minimalist theme, you can choose a carpet with bold colourful patterns to set the tone for an impressive feature wall.

Tips:
  • Cut any pattern you desire from craft paper and ensure that its size and shape conform to the size of your bed. Do this before you start to cut into your carpet.
  • Trace your pattern on plywood and cut it out using a jigsaw.
  • Sand, prime, and paint the edges of the plywood using semi-gloss latex paint and make it the same colour as a plain carpet. For a patterned carpet, use one of the colours in the colour mix.
  • Use adhesive caulk to secure the carpet (give extra allowance) to the plywood and allow it to dry thoroughly.
  • With a sharp utility knife, cut the carpet or carpet tiles to the shape of the plywood and use a rubber mallet to nail in large nail heads 1” from the edge and around the sides and top.
  • Hang the headboard at your desired height.
  • To care for your carpeted headboard, clean it with a vacuum attachment to remove any dust.

Now that you have been inspired by these unique headboard ideas, you will not only save a lot of money, but you will also be pleased that you can create any of them without requiring the services of an interior decorator or home improvement expert.


(Culled from originally published article by the author on Discover.HubPages in 2013)


Articles of interest
How to Develop an Interior Design Concept – 5 Basic Principles to Follow
How to Write An Interior Design Contract Agreement Document

*If you like this post, and find it beneficial or interesting, kindly share it. It will be greatly appreciated :)

How to Make Area Rugs from Old Clothes

People have been making rag-area rugs for centuries, as far back as the 17th to 18th century. Today, there is a renewed interest in its creation, and you, too, can crochet with fabric strips cut from old clothes.


A rag area rug is a traditional hand-woven carpet, made from old and discarded clothes. This craft has been around for hundreds of years and involves crocheting strips of cloth to create a floor covering.

Long ago, when clothes were so worn that they were no longer useful to wear, they were hardly thrown away and too old to be given out. Every old bit of anything a family owned was recycled and put to good use for the benefit of the family. And if gifts needed to be presented, rag rugs made from the same worn-out materials were used.

Today, the popularity of rag area rugs continues to rise, and people love them so much that they either go out to buy one or hand-weave one for their own use or as a gift. Also, for those who love craft-making, ‘rag-rugging’ is great fun and when it is completed, makes a wonderful item to spread on your living room or bedroom floor.


A rag area rug made from different pieces of old or discarded clothes.

Materials You Can Recycle to Make Rag Rugs

Making handwoven rugs is a great way to recycle your old garments, which can include:
  • Old jeans
  • Blankets
  • Bed sheets and pillowcases
  • Shirts and skirts
  • Old jumpers
  • Old but soft leather bags
  • Curtains and drapery
  • Old towels
  • Ribbons
  • Toughened plastic bags.

The best rag area rug has a good mix of fabrics in a planned colour-coordinated way, and a variety of textured materials can also be added to the mix.

If you would rather use new strips of fabric instead of old clothes, you can purchase a mix of cheap fabric or fabric rejects online or from any of your local fabric shops. Wherever people live, cheap fabric shops and flea-type markets abound so especially look out for leftover strips gotten from bales of fabrics.

There are different types of rag rugs, and each is constructed differently from the others. They can come in one solid colour or as a multi-coloured rug.

If you want a soft rug, use fabrics that are soft underfoot, like bedsheets, pillowcases, or old t-shirts. On the other hand, if you want a rag rug that is thick, strong, and longer-lasting, you can use old jeans, suits, or flannel.

If you can crochet with yarn, then you can crochet a rag area rug with fabric strips. It’s the same basic crocheting principle. Don’t worry too much about perfection because the idea of a rag area rug is not to achieve the intricate look of a machine-woven carpet. These are handmade rugs meant to be a work of art and therefore need not be perfect.

A close-up photograph of a crocheted rag rug made of recycled rags from 
old bed sheets and pillowcases. 

A variety of rag rugs.

How to Make Handwoven Area Rugs

Rag area rugs are quite easy to make, and if you are skilled at the art of making them, you can complete one (depending on its size) in just a couple of days. For a beginner, the process is fairly straightforward, and if you can do some simple crocheting, you can make a rag rug because the most basic and simple technique of crocheting will suffice. The tools you need to make a rag rug are:

  • Needle and thread
  • Sewing machine
  • A sharp pair of cloth scissors
  • A large crochet hook (the US size Q is perfect for the job)
  • Old clothes or other textiles found around the home

Method

Make sure you have enough materials to make the rug size you want, but if you are a beginner, just use what you have available and consider it a test run. But if you have a certain space you'd like to use the rug and need it to be the right size, you'll need to be sure you have enough material to use.
  • Cut all the material into I” or 2” strips, depending on the fabric and the look you desire.
  • If the strips you have are short, join them together by sewing or knotting at the short end to create longer strips.
  • If you can crochet with yarn, then you can crochet a rag area rug with fabric strips. It’s the same basic crocheting principle. Follow a half double crochet
  • With the large crochet hook (the large crochet hook allows looser stitching), start the rug with a chain stitch as long as you want the rug to be wide.
  • After you create a chain, start the half-double crochet stitches.
  • Wrap the strip around the hook and hold it with a finger so it doesn’t slip off the hook.
  • Push the tip of the hook through the hole, hook the fabric strip and pull the hooked strip out through the hole.
  • Continue to pull it through both loops on the hook.
Don’t worry too much about perfection because the idea of a rag area rug is not to achieve the intricate look of a machine-woven carpet. These are handmade rugs meant to be a work of art and therefore need not be perfect.

Tips:
  • Add on strips as you crochet, or make all that you’ll need in advance.
  • Make all your strips up first if you plan to dye them to look evenly random.
  • If you want simple stripes on a rectangle rag rug, for instance, you can add on as you crochet and change strip colours at the edges as required.
  • Using a large crochet hook allows stitches to be relaxed, so it’s easy to unravel if you hate the end result and want to do it all over again.
  • You can get area rug-making kits that have every tool you will need for your task, including backcloths.
  • On completion, iron it with a steam iron, especially if the edges are ruffling.

Rag Rug Making, a Perfect Craft for the Family

When kids are free or on vacation and want something exciting to do, give them this fun task to do. They can make their own rag area rug for their bedroom or for any other space in the house. And if they get good at making them, they can sell them to family and friends and earn some money in the process.

Even the elderly can join in the fun of making handmade rugs. They have a lot of free time on their hands to take up rug-making crafts. They may even take the craft up to earn some income, too.

They will make great gifts for their family members, friends, and even as gifts for children in orphanages, and homeless people in localities to help insulate them from the cold.


*Browse more posts in Interior Accents for more decorating ideas.


Related articles

(Originally published by the author on Discover.HubPages in 2009)

Affordable Headboard Idea: Gallery of Framed Photographs and Artwork

Create a headboard with a cluster of framed images that show your personal style.
(Image created by viryabo@polyvore)

If you are a conformist and feel safer keeping to conventional headboard designs, you’ll be losing out on expressing your creative ideas. However, non-conformists who like the unusual and wish to reflect it in the style of their bedroom don’t follow any hard and fast rules when it comes to home décor. They get creative and save money in the process.
This unique headboard idea involves hanging a cluster of framed favourites on the wall above the bed's head. Framed art can be anything from black-and-white photographs to abstract paintings, all in varying sizes for an asymmetrical look or, if you prefer, arranged in a symmetrical order. This arrangement will not only create a focal point for the bedroom but also make the entire room look very impressive.

If you have a collection of pictures that hold fond memories of loved ones, pets, friends, or colleagues, instead of having them stashed away somewhere, soon to be forgotten, gather them together and frame them with different coloured picture frames. Use them to create a gallery to serve as a headboard.

If you don’t have such collections, use art. You will find small art images and pictures at flea or street markets.

Tips

  • Use sepia or black-and-white images with white or black frames for a classic vintage look.
  • For a more colourful and modern look, use coloured photographs in bright colourful frames.
  • For a dramatic look, hang as many as you desire, even up to the ceiling if you love the look.
  • Ensure you allow a gap between the bottom line of the photographs and the top edge of the bed to give you enough space for ample pillow arrangements.
  • The trick is to ensure they are all small-sized framed art in varying sizes.


(Culled from originally published article by the author on Discover.HubPages in 2013)


Articles of interest